Skip to content
A complete walkthrough of how a plush toy moves from design file to finished, packaged product — the techniques, checkpoints, and decisions at every stage of production.
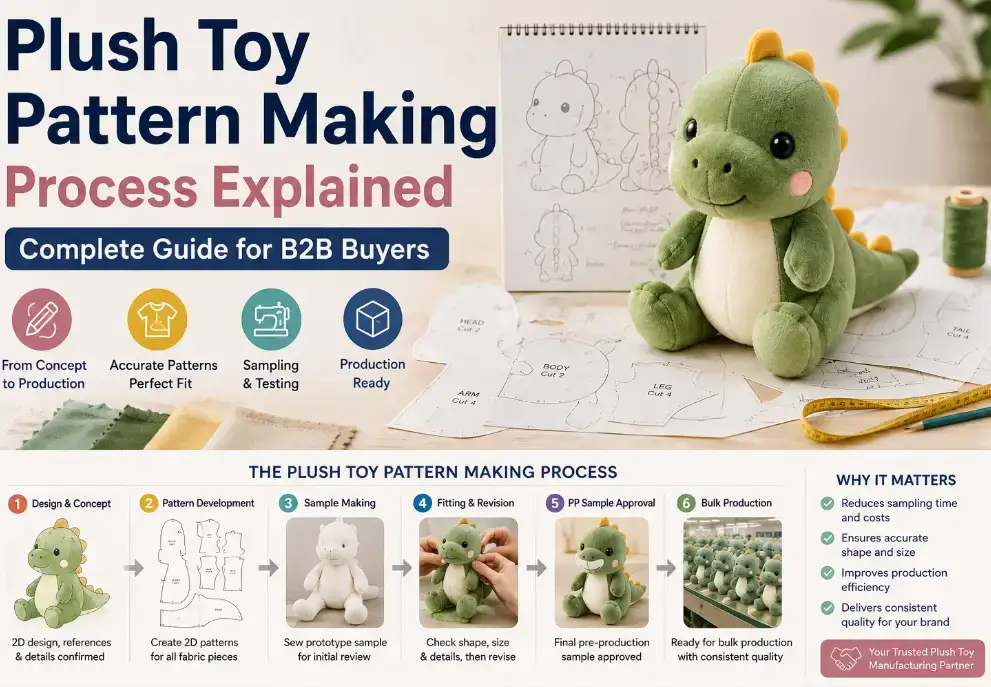
A finished plush toy looks like a single object, but it is the output of a long sequence of distinct manufacturing stages, each performed by a different team, each with its own tolerances, and each capable of introducing a defect that will not be visible until several steps later. A stitch that is slightly too loose at the sewing stage may not show as a problem until the filling stage puts stress on that seam. A pattern that is cut a few millimeters off-grain may not show as an issue until the finished toy is compared side-by-side with the approved sample and the proportions look subtly wrong.
For buyers sourcing plush toys, understanding this sequence in detail is not an academic exercise — it is the foundation for asking the right questions during factory evaluation, catching problems at the stage where they are cheapest to fix, and knowing which checkpoints in the process actually determine whether the finished product will match the approved sample.
This guide walks through the plush toy manufacturing process from initial pattern development through final packaging, explaining what happens at each stage, what can go wrong, and what buyers should look for when evaluating whether a factory’s process is built to deliver consistent, compliant, high-quality output.
What Are the Core Stages of the Plush Toy Manufacturing Process?
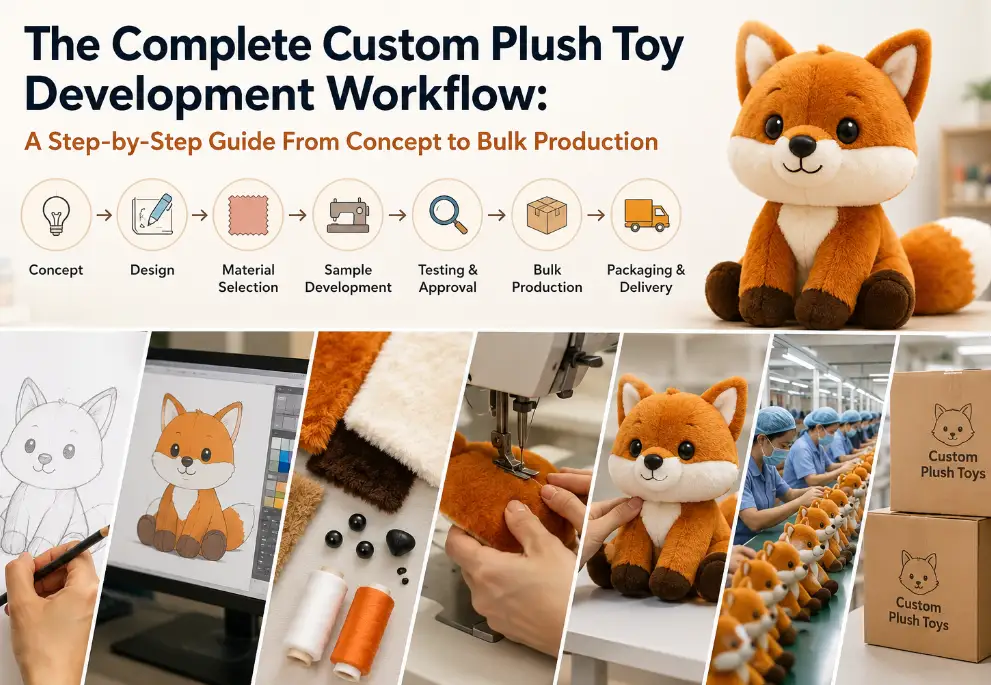
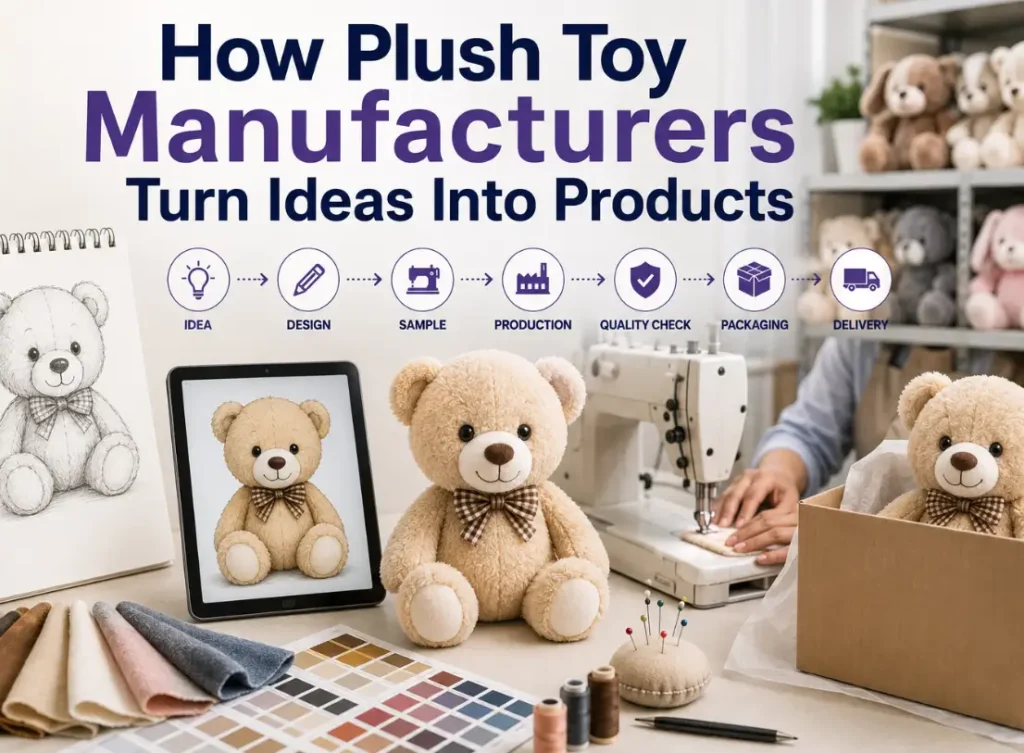
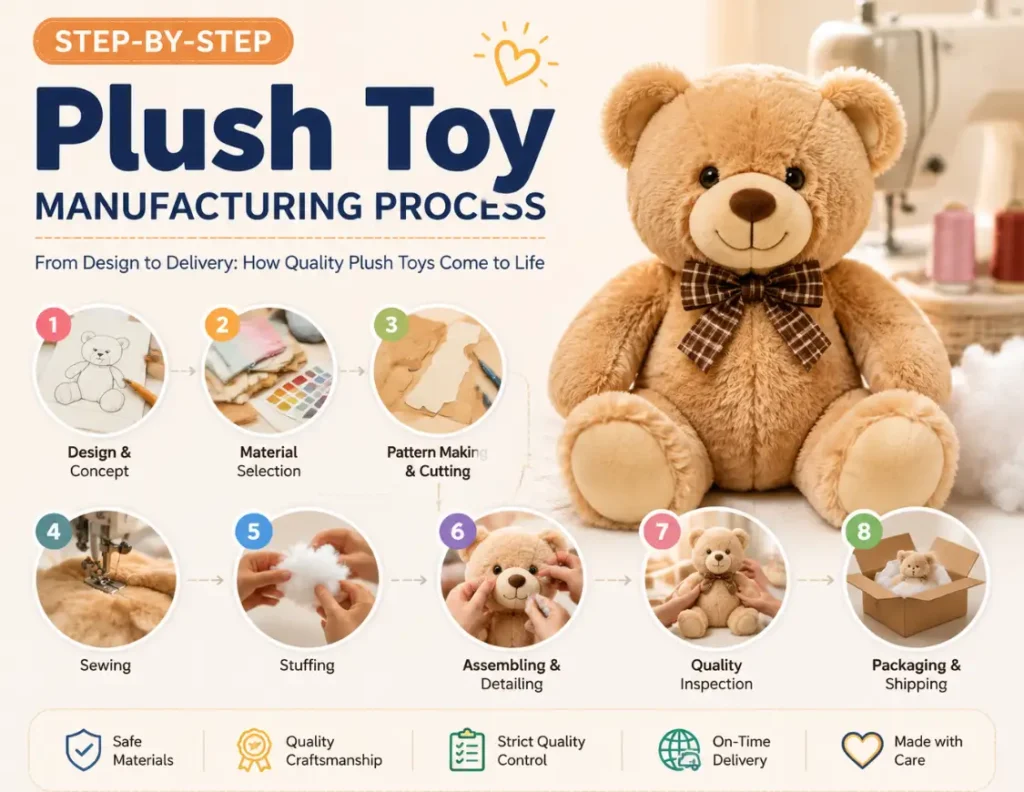
Plush toy manufacturing follows a defined sequence of stages that moves a design from concept through to a shippable finished product. While specific factories may organize their workflow slightly differently, the underlying stages are consistent across the industry because each one addresses a distinct technical requirement that cannot be skipped or merged without compromising the finished product.
The core stages of the plush toy manufacturing process are design and pattern development, material sourcing and preparation, cutting, sewing and assembly, filling and stuffing, safety component attachment, embroidery and surface decoration, quality control inspection, and packaging and labeling. Each stage depends on the one before it being executed correctly, which is why a defect introduced early in the sequence tends to compound rather than stay contained.
Overview of the Plush Toy Manufacturing Sequence
| Stage | Primary Objective | Typical Team Involved |
|---|---|---|
| Design & pattern development | Translate design concept into a production-ready flat pattern | Design and pattern-making team |
| Material sourcing & preparation | Secure and prepare fabric, filling, and accessory materials | Procurement and material inspection team |
| Cutting | Cut fabric pieces accurately according to the pattern | Cutting room operators |
| Sewing & assembly | Join cut pieces into the three-dimensional toy shell | Sewing line operators |
| Filling & stuffing | Fill the shell to achieve correct shape, density, and feel | Stuffing station operators |
| Safety component attachment | Attach eyes, noses, joints, and other components securely | Assembly line operators, QC checkpoint |
| Embroidery & surface decoration | Apply embroidered details, printing, or appliqué | Embroidery and finishing team |
| Quality control inspection | Verify finished units meet specification and safety standards | QC inspectors |
| Packaging & labeling | Package units and apply required compliance labeling | Packaging team |
The sections below walk through each of these stages in detail, explaining the specific techniques used, the decisions that affect finished quality, and the points where buyers should focus their attention when evaluating or auditing a supplier’s process.
How Does Design and Pattern Development Work?
Pattern development is the stage where a two-dimensional design concept — a sketch, a character reference image, or a 3D rendering — is translated into the flat pattern pieces that will actually be cut from fabric and sewn together. This translation is a specialized skill distinct from illustration or product design, because it requires understanding how flat fabric pieces will behave when sewn and stuffed into a three-dimensional form.
Pattern development works by breaking the intended finished shape into individual panel pieces — typically a body, head, limb, and ear or tail panels for an animal-style plush — each drafted with the correct curves, seam allowances, and dart placements needed to achieve the target proportions once assembled and filled. An experienced pattern maker accounts for how fabric pile direction, stretch, and thickness will affect the final shape, which is why the same flat pattern can produce noticeably different results depending on the fabric it is cut from.
Why the First Pattern Rarely Matches the Final Approved Version
It is standard, expected practice for an initial pattern draft to require adjustment after the first sample is sewn and stuffed. Flat pattern pieces are a two-dimensional approximation of a three-dimensional outcome, and certain proportional issues — a head that sits too small relative to the body, an ear placement that looks correct on paper but off-center once stuffed — only become visible once the pattern is actually constructed in fabric.
This is why pattern development is typically an iterative process involving at least one, and often two or three, rounds of sample construction and pattern grading before the design is finalized for production. Buyers should expect and budget time for this iteration rather than treating a first-sample proportion issue as a sign of low factory competence — it is a normal part of translating a flat design into a dimensional product.
Tip: Request that the pattern maker note seam allowance and fill density assumptions on the approved pattern file. If either changes later in production — a different operator using a different seam allowance, for example — the finished proportions will drift from the approved sample even though the flat pattern technically has not changed.
How Pattern Grading Works When a Design Needs Multiple Sizes
Many plush toy programs require the same character or design produced in more than one size — a small keychain version alongside a standard collectible size, for example. Pattern grading is the technique used to scale an approved pattern up or down to a target size while preserving the correct proportional relationships between panels, rather than simply enlarging or shrinking the entire pattern uniformly.
Grading is necessary because a uniform scale-up does not always produce a proportionally correct result — seam allowances, for instance, do not scale at the same rate as the overall pattern, and certain features such as embroidered eye placement or ear thickness need graded adjustment rather than pure mathematical scaling to look correct at the new size. Factories with strong pattern-grading capability can extend a single approved design across a size range efficiently; those without it often need to treat each size as a near-independent development effort, which adds cost and timeline for multi-size programs.
How Is Fabric and Material Sourced and Prepared?
Once a pattern is approved, the corresponding materials — outer fabric, lining if applicable, filling, thread, and any safety components such as eyes or joints — must be sourced in the correct type, color, and quantity, and prepared for the cutting stage. Material sourcing is where compliance requirements, cost targets, and quality standards intersect most directly, since the material choices made here determine both the finished feel of the product and its ability to pass safety testing.
Material sourcing and preparation work by confirming that fabric rolls match the approved color, pile height, and GSM specification, verifying that filling material meets the density and compliance grade specified for the product, and pre-treating fabric where needed — steaming to relax pile direction, pre-shrinking where dimensional stability matters, or color-matching dye lots across a production run to avoid visible shade variation between units.

Common Materials Prepared at This Stage and What Is Checked
| Material | What Is Verified | Why It Matters |
|---|---|---|
| Outer fabric | Color match, pile height, GSM, dye lot consistency | Determines feel, appearance, and shade uniformity across units |
| Filling material | Density grade, compliance certification, cleanliness | Affects shape retention and safety compliance |
| Thread | Tensile strength, colorfastness | Determines seam durability and appearance |
| Safety eyes/noses | Size, attachment mechanism, pull-test documentation | Directly affects mechanical safety compliance |
| Embroidery thread | Color match, colorfastness | Affects appearance durability after washing |
Why Dye Lot Consistency Is a Recurring Production Challenge
Fabric dye lots — batches of fabric dyed together to a specific color target — can vary slightly from one production run to the next, even when ordered to the same color code from the same supplier. This variation is generally too subtle to notice in a single unit but becomes visible when units from different dye lots are placed side by side, which is a common cause of buyer complaints about “color inconsistency” in a delivered order.
Factories with mature material management practices track dye lot numbers against production batches and, where an order requires visual consistency across units — such as a matched set of characters — source enough fabric from a single dye lot to cover the full order, or blend cutting layouts to distribute any dye lot variation evenly rather than concentrating it in specific units.
Tip: For orders where color consistency across units matters — retail multi-packs or matched character sets, for example — specify a single dye lot requirement in the purchase order and ask the factory to confirm fabric availability against that requirement before cutting begins.
How Are Plush Toy Pieces Cut?
Cutting is the stage where the approved pattern is used to cut individual fabric pieces from prepared fabric rolls, and it is a stage where precision has an outsized effect on downstream assembly quality — a piece cut even slightly off the pattern outline will not align correctly during sewing, producing puckering, asymmetry, or seam stress that shows up as a visible defect in the finished toy.
Plush toy pieces are cut using one of several methods depending on order volume, fabric type, and precision requirements — manual cutting with cutting knives and pattern templates for smaller runs and high-pile fabrics that resist die-cutting, die-cutting for higher-volume runs on more uniform fabrics, and increasingly, computer-controlled cutting for factories producing complex, multi-panel designs at scale where cutting accuracy and material yield optimization both matter.
Comparison of Common Plush Toy Cutting Methods
| Cutting Method | Best Suited For | Precision Level | Typical Volume Fit |
|---|---|---|---|
| Manual knife cutting | Small runs, high-pile or textured fabric | Operator-dependent, moderate to high with skilled cutters | Low to moderate volume |
| Die-cutting | Uniform fabrics, repeat production runs | High and consistent across units | Moderate to high volume |
| Computer-controlled (CNC/laser) cutting | Complex multi-panel designs, high-precision requirements | Very high, minimal operator variation | High volume, complex designs |

Why Pile Direction Consistency Matters More Than It Appears To
Plush fabric has directional pile — the fibers lie at an angle rather than standing perfectly vertical — which means the fabric looks and feels different depending on the direction it is viewed or stroked from. If pattern pieces are cut without controlling for pile direction consistently across all pieces, the finished toy will show visible shading differences between panels that were cut with the pile running in different directions, even though the fabric itself is identical.
Experienced cutting rooms lay pattern pieces on the fabric with a consistent pile-direction marker carried through from the approved pattern, and this detail — invisible in a pattern file that does not explicitly mark pile direction — is one of the most common sources of a finished toy that looks subtly “off” compared to the approved sample despite using the correct fabric.
Tip: Ask whether the cutting pattern explicitly marks pile direction for each panel piece. A pattern without this marking leaves pile-direction consistency up to individual cutter judgment, which is a common and often-overlooked source of shading inconsistency in finished units.
How Pattern Nesting Affects Material Yield and Cost
Pattern nesting — how efficiently the individual pattern pieces are arranged on the fabric roll before cutting — directly determines how much usable fabric is consumed per unit and how much is left over as waste. A poorly nested layout can leave ten to twenty percent more fabric unused than a well-optimized one, and since fabric typically represents a large share of total unit cost, nesting efficiency has a real and measurable effect on the final unit price a factory can offer.
Computer-controlled cutting systems generally achieve better nesting efficiency than manual layout, since software can test many arrangement permutations quickly to minimize waste, which is one of the practical cost advantages that pushes higher-volume orders toward automated cutting even when manual cutting would technically be capable of handling the fabric type.
How Does Sewing and Assembly Work?
Sewing and assembly is the stage where individually cut fabric panels are joined into the three-dimensional shell of the finished toy, and it is generally the most labor-intensive and skill-dependent stage in the entire process. The sequence in which panels are joined, the seam allowance maintained, and the stitch density used all directly affect both the finished appearance and the structural strength of the toy.
Sewing and assembly work through a defined joining sequence — typically starting with smaller sub-assemblies such as limbs, ears, or facial panels, which are sewn, partially turned right-side-out, and set aside, before the main body panels are joined and the sub-assemblies are inserted and secured into the body seam during final closing. This sequencing exists because certain seams become inaccessible once the main body is closed, so any component that needs to be sewn from the inside must be completed before that point.
Typical Sewing and Assembly Sequence
| Step | What Happens | Why It Happens in This Order |
|---|---|---|
| Sub-assembly construction | Limbs, ears, tails sewn and partially turned | Requires access that will be lost once body is closed |
| Facial panel assembly | Face, muzzle, or feature panels joined | Often requires precise alignment before body attachment |
| Main body panel joining | Primary body panels sewn together, leaving a stuffing opening | Forms the main shell the sub-assemblies attach to |
| Sub-assembly insertion | Limbs, ears, and other components inserted into body seam | Must occur before the body seam is fully closed |
| Turning | Assembled shell turned right-side-out through stuffing opening | Conceals internal seams and prepares shell for filling |
Why Seam Allowance Consistency Is a Direct Quality Indicator
Seam allowance — the distance between the stitch line and the fabric edge — has a direct effect on both the finished silhouette of the toy and the seam’s ability to withstand the stress of filling and later handling. A seam allowance that varies across a production run, even by a millimeter or two, produces finished units with slightly inconsistent proportions relative to each other and to the approved sample, and seams sewn with too narrow an allowance are more prone to fraying and eventual seam failure under stuffing pressure.
Consistent seam allowance is maintained through operator training, sewing machine guides set to the specified allowance, and periodic in-line spot checks — and it is one of the more reliable indicators of overall sewing line discipline, since a factory that maintains tight seam allowance consistency is generally also managing other construction variables with similar rigor.

Tip: During a factory visit or sample review, measure seam allowance at several points on multiple finished units from the same batch. Noticeable variation between units is an early warning sign of inconsistent sewing line discipline that is likely to affect other quality dimensions as well.
Why Turning and Topstitching Are Higher-Skill Steps Than They Appear
Turning a sewn shell right-side-out through a relatively small stuffing opening — particularly for designs with thin limbs or narrow extremities such as ears or tails — requires specific technique and often specialized turning tools to avoid stressing or tearing the seam during the process. Designs with especially thin extremities are more prone to turning difficulty, which is a factor pattern makers account for when drafting extremity width, since a shape that looks fine on paper can be genuinely difficult to turn once sewn.
Topstitching — visible decorative or reinforcing stitching applied after the main construction — adds a further layer of skill requirement, since it must be applied evenly and at a consistent distance from the seam edge to look intentional rather than uneven. Designs relying heavily on topstitched detail benefit from being produced by sewing teams with specific experience in that technique, and buyers evaluating a factory for a topstitching-heavy design should ask to see finished examples of similar work rather than assuming general sewing competence transfers directly.
How Is Filling and Stuffing Done?
Filling and stuffing is the stage that gives the plush toy its final three-dimensional shape and tactile feel, and it is a stage where the difference between an experienced and inexperienced operator is often immediately visible in the finished product — uneven filling density produces lumpy, asymmetric, or overly firm or soft results even when the same amount of filling material is used.
Filling and stuffing works by inserting filling material through the stuffing opening left during body assembly, working it by hand or with stuffing tools into extremities such as limbs, ears, and head first, then building density evenly through the main body cavity, checking shape and symmetry against the approved reference sample throughout the process rather than only at the end.
Common Filling Materials and Their Handling Characteristics
| Filling Type | Handling Characteristic | Typical Use Case |
|---|---|---|
| PP cotton (polyester fiberfill) | Lightweight, easy to distribute evenly, good shape recovery | Standard plush toys, most general-purpose products |
| Memory foam/microbeads | Requires enclosed inner lining, different handling technique | Weighted or texture-focused plush products |
| Glass or plastic pellets | Used in combination with fiberfill for weighting, requires containment | Weighted plush toys, beanie-style products |
| Natural fiber filling | Denser handling, less uniform than synthetic fiberfill | Products marketed on natural or eco-friendly material claims |
Why Filling Density Must Be Checked Against a Reference Sample, Not by Feel Alone
Experienced stuffing operators develop a strong intuitive sense of correct filling density, but relying on operator judgment alone, without a physical reference check, allows density to drift gradually across a long production run — a phenomenon sometimes called stuffing drift, where units produced later in a shift trend firmer or softer than units produced earlier as operator fatigue or subtle technique variation accumulates.
Mature production lines address this by maintaining a physical reference sample at the stuffing station that operators periodically compare against by weight or hand-feel, and by weighing filled units against a target weight range as an objective secondary check that does not rely purely on subjective judgment.
Tip: Ask whether the stuffing station uses a weight-based check in addition to visual and hand-feel comparison against the reference sample. Weight is a simple, objective, and fast way to catch density drift that a purely visual check can miss, particularly across a long production shift.
How Weighted Plush Handling Differs From Standard Filling
Weighted plush toys — products that combine standard fiberfill with a denser material such as glass or plastic pellets to add heft, often marketed for their calming or sensory properties — require a meaningfully different stuffing process than standard fiberfill-only products. The weighted material must be contained within its own inner pouch or compartment, separate from the outer fiberfill layer, to prevent it from shifting unevenly or working through the outer fabric over time.
This inner containment adds a construction step that standard plush products do not require, and it introduces its own quality risk — a poorly sealed inner pouch is a common cause of weighted plush product returns, where the dense filling material gradually migrates and creates lumps or uneven weight distribution after a period of normal handling. Buyers sourcing weighted plush products should specifically confirm the inner pouch construction method and ask for evidence of stress testing on the inner seam, since this detail is easy to overlook when reviewing a fresh, unused sample.

How Are Safety Components Attached?
Safety component attachment — securing eyes, noses, joints, and any other rigid or semi-rigid accessory — is the stage most directly tied to mechanical safety compliance, since these components are the parts most commonly implicated in choking hazard test failures. The attachment method used here determines whether the finished toy will pass the pull and torque testing required under standards such as ASTM F963 and EN71-1.
Safety components are attached using a washer-and-post mechanism for plastic safety eyes and noses — where the component post passes through the fabric and is secured on the inside with a locking washer — reinforced with stitching in many cases, or, for younger age-grade products, replaced entirely with embroidered or appliquéd features that eliminate the detachment risk associated with rigid components altogether.
Safety Component Attachment Methods and Testing Requirements
| Component Type | Attachment Method | Testing Applied |
|---|---|---|
| Plastic safety eyes/noses | Post-and-locking-washer through fabric, often reinforced with stitching | Pull test (typically 90N), torque test |
| Embroidered features | Direct stitching into fabric, no rigid component | Seam/thread strength check, no pull test applicable in same way |
| Jointed limbs (rotating) | Internal disc-and-pin or button joint mechanism | Torque test, impact test |
| Bows, ribbons, appliqués | Stitched attachment, sometimes reinforced with bar-tacking | Pull test at attachment point |
Why Attachment Testing Must Happen on the Finished, Assembled Unit
Testing a safety component in isolation — pulling on an eye before it is attached to the actual fabric and filling combination used in production — does not reliably predict how it will perform once assembled, because the failure point in a real pull test is often the fabric tearing around the washer rather than the component itself detaching from its post. This means attachment strength is a property of the whole assembly, not the component alone, and must be verified on finished units built with the actual production fabric, filling density, and stitching pattern.
This is also why any change to fabric type, filling density, or stitching pattern partway through a production run should trigger a fresh round of attachment testing rather than relying on results from an earlier, differently-configured sample.
How Age Grading Changes Which Safety Components Can Be Used
The intended age range of a plush toy directly restricts which component types are permitted under the applicable safety standard, which is why safety component selection must happen alongside — not after — the design and age-grading decision. Products graded for children under three years old generally cannot use rigid plastic eyes or noses at all under the strictest interpretation of small-parts risk avoidance, which is why many infant-targeted plush designs rely entirely on embroidered or appliquéd facial features rather than attached components.
Products graded for older age ranges have more design flexibility, since the small parts and pull-test thresholds that apply to older age grades are less restrictive. This means a single character design intended to span multiple age-grade product lines may need two distinct component specifications — an embroidered-feature version for the infant line and a component-attached version for the older age-grade line — rather than one specification used across the full range.
Tip: Request that pull testing be performed on finished units pulled directly from the current production run — not on a pre-production sample alone — particularly for larger orders where any mid-run material substitution could affect attachment strength without necessarily being reported.
How Is Embroidery and Surface Decoration Applied?
Embroidery and surface decoration — facial features, brand marks, decorative patterns, or printed details — is typically performed either before or after the main assembly stage depending on the specific panel involved, and it is a stage where design fidelity to the approved artwork is the primary quality concern, alongside colorfastness and stitch density that affects durability through repeated handling and washing.
Embroidery is applied using digitized embroidery files that translate the approved artwork into a stitch-by-stitch machine program, with stitch density, thread tension, and color sequence all calibrated to reproduce the design accurately on the specific fabric being used — since fabric pile height and texture affect how cleanly embroidery renders, a digitized file calibrated for one fabric type may need adjustment when applied to a different one.

Why Embroidery Digitizing Requires Fabric-Specific Calibration
A digitized embroidery file created and tested on a smooth, short-pile fabric will frequently produce a different result — details that appear blurred, uneven stitch coverage, or thread that sinks into the pile — when applied without adjustment to a longer or denser pile fabric. This is a common cause of finished units where embroidered facial features look noticeably less crisp than the approved sample, despite using the same digitized file.
Factories with mature embroidery capability re-test and adjust digitized files whenever the target fabric changes meaningfully in pile height or density, rather than assuming a file proven on one fabric will translate directly to another.
How Does Quality Control Work Throughout Production?
Quality control in plush toy manufacturing is not a single inspection event at the end of the line — it is a series of checkpoints distributed across the entire production sequence, each designed to catch a specific category of defect at the stage where it is cheapest and easiest to correct, before it compounds into a downstream problem or a finished-goods failure.
Quality control works through a layered checkpoint structure — incoming material inspection before cutting begins, in-process spot checks during cutting, sewing, and stuffing, and a final pre-shipment inspection performed on a random sample of finished, packaged units against an agreed Acceptable Quality Limit sampling plan. Needle and metal detection is typically performed as a dedicated checkpoint on finished, stuffed units before packaging, since this is the stage where any broken needle fragment from the sewing process would be sealed inside the product.
Quality Control Checkpoints Across the Production Line
| Checkpoint | What Is Checked | Timing |
|---|---|---|
| Incoming material inspection | Fabric, filling, and component specification match | Before cutting begins |
| In-process cutting check | Pattern accuracy, pile direction consistency | During cutting |
| In-process sewing check | Seam allowance, stitch density, alignment | During sewing and assembly |
| Stuffing density check | Fill weight and shape against reference sample | During filling stage |
| Component attachment testing | Pull test, torque test on finished units | After assembly, before packaging |
| Needle and metal detection | No broken needle fragments present | After stuffing, before packaging |
| Final AQL inspection | Random sample against full specification and safety criteria | Pre-shipment, on packaged units |
Tip: Ask specifically whether needle and metal detection is performed on every unit or on a sample basis. Full-unit detection is a meaningfully stronger safety control than sample-based detection, and the difference is rarely volunteered unless directly asked.
How AQL Sampling Levels Affect What Final Inspection Actually Catches
Final pre-shipment inspection is typically conducted against an Acceptable Quality Limit sampling plan, which defines how many units from a given order size must be inspected and how many defects of each severity level — critical, major, or minor — are permitted before the batch is rejected. The specific AQL level chosen has a direct effect on how much confidence the inspection result actually provides, and this is a detail buyers frequently leave unspecified, allowing the factory’s default level to apply without discussion.
A tighter AQL level, such as 1.5 for major defects, requires a larger sample size and permits fewer defects before rejection than a looser level such as 4.0, which means two orders of the same size can receive meaningfully different inspection rigor depending purely on which AQL level was specified in the purchase agreement. Buyers with strict quality requirements, or products where a defect carries elevated safety stakes such as those intended for infants, should specify a tighter AQL level explicitly rather than accepting a factory’s standard default.

How Are Finished Plush Toys Packaged and Labeled?
Packaging and labeling is the final production stage, and while it is sometimes treated as a purely cosmetic step, it carries real compliance weight — required warning labels, age grading statements, care instructions, and country-of-origin markings must be present, accurate, and formatted to the specific requirements of the target market before a shipment can legally be sold there.
Packaging and labeling works by fitting each unit into its specified packaging format — polybag, hang tag and header card, or retail box — while verifying that all required compliance markings are correctly applied, including choking hazard warnings for products with small parts intended for children aged three to six, care and content labeling, and any market-specific requirements such as CPSIA tracking labels for US-bound shipments or CE marking documentation references for EU-bound shipments.
Why Polybag Warnings Are a Frequently Overlooked Compliance Detail
Products packaged in polybags are subject to specific suffocation warning label requirements in several markets, tied to bag dimensions and thickness. This requirement is sometimes overlooked by factories focused primarily on toy-specific safety compliance, since it is a packaging material regulation rather than a toy safety standard in the strict sense. Buyers should confirm polybag warning label compliance separately from toy safety certification, since passing one does not automatically confirm the other.
What Is a Realistic Production Timeline for the Full Manufacturing Process?
Understanding realistic timing for each stage of the manufacturing process allows buyers to plan launch dates accurately and to recognize when a quoted timeline is unusually optimistic relative to the order’s actual complexity and volume.
Typical Timeline by Production Stage for a Standard Order
| Stage | Typical Duration | Factors That Extend It |
|---|---|---|
| Design & pattern development | 1–3 weeks | Complex character design, multiple revision rounds |
| Material sourcing | 1–2 weeks | Certified or specialty material lead times |
| Sampling & approval | 2–4 weeks (may include multiple rounds) | Proportion or color revisions requiring re-sampling |
| Bulk production (cutting through packaging) | 3–6 weeks depending on order volume | Order size, seasonal capacity demand, design complexity |
| Final inspection & compliance testing | 3–7 days | Retesting required after an initial failure |
| Shipping preparation | 2–5 days | Documentation completeness, carrier scheduling |
Adding these stages together, a realistic total timeline from finalized design brief to shipment readiness for a standard plush toy order typically falls between eight and fourteen weeks, with the wider end of that range applying to designs requiring multiple sampling rounds, certified or specialty materials, or production scheduled during a factory’s seasonal peak period.
Why Seasonal Capacity Demand Is a Frequently Underestimated Timeline Factor
Plush toy factories serving markets with strong holiday and back-to-school retail cycles experience significant seasonal swings in capacity utilization, with order volume concentrated heavily in the months leading up to peak retail seasons. A production timeline quoted during a factory’s lower-demand period can look meaningfully different from the timeline available for the same order placed during peak season, when cutting, sewing, and stuffing capacity are all more heavily booked across multiple client orders simultaneously.
Buyers planning a launch tied to a specific seasonal retail window should place orders with enough lead time to absorb this seasonal capacity effect, and should ask factories directly how their quoted timeline compares to their typical peak-season timeline for a similarly sized order, rather than assuming the quoted figure already reflects seasonal conditions.

Conclusion
The plush toy manufacturing process is a sequence of interdependent stages, each requiring its own specific technique, tolerance, and checkpoint — and each capable of introducing a defect that only becomes visible once the product moves further down the line. Pattern development sets the proportional foundation everything else builds on. Material sourcing and cutting determine consistency across units. Sewing and filling determine structural integrity and finished feel. Safety component attachment determines whether the product will pass the testing required to legally reach a shelf. Quality control, distributed across every stage rather than concentrated at the end, is what catches problems while they are still cheap and simple to correct.
Buyers who understand this sequence in detail are better equipped to evaluate a factory’s actual production discipline — not just its finished samples — and to ask the specific, stage-by-stage questions that reveal whether a supplier’s process is built to deliver consistent quality across a full production run, not just a single hand-finished sample. That understanding is the difference between a sourcing relationship built on trust in a glossy sample and one built on verified, repeatable process control.
No single stage in this sequence operates independently of the others, which is also why the most reliable production partners are the ones who maintain visibility and communication across the full chain rather than treating each stage as a handoff to be forgotten once complete.
A pattern maker who understands how their seam allowance choices will affect the stuffing station’s density targets, or a cutting room that flags a pile-direction inconsistency before it reaches sewing, is applying exactly the kind of cross-stage awareness that keeps a long production run consistent with the sample that was originally approved. For buyers, asking how a prospective supplier manages this cross-stage communication — not just how each individual stage performs in isolation — is often the most revealing question available during supplier evaluation.
Frequently Asked Questions
Q1: How many rounds of sampling does a typical new plush toy design require before it is ready for bulk production?
Most new plush toy designs require between one and three rounds of sampling before final approval, depending on design complexity and how closely the first sample matches the original concept. A simple, well-referenced design with a straightforward pattern may be approved after a single revision round, while a complex character design with specific proportional requirements — particularly designs based on an existing illustrated character — often requires two or three rounds to achieve an accurate match. Buyers should build sampling time into their project timeline based on design complexity rather than assuming every design will be approved on the first or second attempt.
Q2: What is the difference between hand-sewing and machine-sewing in plush toy production, and does one produce better quality?
Machine sewing handles the majority of straight and moderately curved seams in standard plush toy production and is generally more consistent across large volumes than hand sewing, since it removes some of the operator-to-operator variation inherent in manual stitching. Hand sewing remains necessary for specific tasks that machines cannot easily perform — closing the final stuffing opening with a blind stitch that leaves no visible seam, attaching certain small or delicate embellishments, and finishing detail work on complex facial features. Neither method is inherently higher quality; the appropriate choice depends on the specific task, and a well-run factory uses machine sewing where it improves consistency and hand-finishing where it is required for the task or the aesthetic result.
Q3: Can the plush toy manufacturing process be meaningfully shortened for buyers who need a faster turnaround?
Certain stages can be compressed under specific conditions — using an existing, already-approved pattern rather than developing a new one, sourcing from in-stock fabric rather than custom-dyed material, and paying a rush premium for priority production scheduling can meaningfully reduce total timeline. However, stages tied to physical processes with inherent minimum durations — fabric dyeing lead times, multi-round sampling for a genuinely new design, and compliance testing turnaround — have practical limits to how much they can be compressed without increasing quality and compliance risk. Buyers with firm deadlines should communicate them at the start of the design process, since the available compression options are far more limited once bulk production has already begun.
Q4: Why do finished plush toys sometimes look slightly different from the approved sample even when the same factory produces the bulk order?
This gap most commonly traces back to a variable that changed between the sample and bulk production without being formally re-approved — a different fabric dye lot with a subtly different shade, a stuffing operator working at a different density than the original sample, or a seam allowance that drifted slightly due to a different machine operator on the bulk line. Because plush toy quality depends on the coordinated consistency of several manual and semi-manual processes, any one of these variables shifting slightly can produce a finished result that is technically within tolerance but visibly different from the specific sample used for approval. Requesting that the factory retain and reference the physical approved sample throughout bulk production, rather than working purely from written specifications, is the most effective way to minimize this drift.
Q5: What role does the sample room play differently from the main production line?
The sample room is typically staffed by a factory’s most experienced pattern makers and sewers, who develop and refine new designs before they are handed to the main production line for volume manufacturing. This specialization exists because sample development requires problem-solving skills — adjusting a pattern on the fly to fix a proportion issue, for example — that differ from the repetitive-task efficiency the main production line is optimized for. A factory with a strong sample room but a less disciplined main line can produce excellent samples that are difficult to replicate consistently at volume, which is why buyers should evaluate main-line production consistency separately from sample quality rather than assuming one predicts the other.
Q6: How does order volume change which manufacturing methods a factory uses for the same design?
Order volume affects the cutting method most directly — small orders are typically manual or die-cut, while larger, more complex orders may justify computer-controlled cutting to improve material yield and precision at scale. Volume also affects how filling and sewing are organized, with larger orders often moving to a more segmented assembly-line structure where individual operators specialize in a single task, compared to smaller orders where a single operator may complete more of the assembly sequence for each unit. These method changes do not necessarily affect finished quality if properly managed, but buyers moving from a small sample order to a much larger bulk order should confirm that the production method change has been accounted for in the factory’s quality control plan.
Q7: What should a buyer do if a factory’s quoted production timeline seems unusually short compared to the stage-by-stage estimates in this guide?
An unusually short quoted timeline should prompt specific follow-up questions rather than either automatic rejection or automatic acceptance — ask which specific stages are being compressed and how, whether the pattern is new or reused from an existing design, whether the required fabric is in-stock or needs to be dyed to order, and whether compliance testing is scheduled with any buffer for a potential retest. A legitimately achievable short timeline usually has a specific, explainable reason — an existing pattern, in-stock materials, available production capacity — while a timeline that is short without a clear explanation is more likely to reflect either an overly optimistic quote or a plan to compress quality control checkpoints to meet the date, both of which carry real risk for the buyer.