Skip to content
Sample development is the phase of custom plush toy sourcing where a design idea stops being a picture and becomes a physical object for the first time. It is also, consistently, the phase where a project either gains momentum toward a smooth bulk production run or begins accumulating the delays, cost overruns, and quality gaps that follow a product all the way to the shelf.
For a buyer working with a plush toy factory for the first time, sample development often feels harder to predict than it should be. A first sample arrives that captures the general idea but misses the details that actually matter. Feedback is sent, a revision comes back, and it still is not quite right. Weeks pass. The launch calendar that once had a comfortable margin starts to feel tight. None of this is inevitable — it is the predictable result of a process that has a clear internal logic most buyers are never shown.
This guide walks through the plush toy sample development process from the first brief to final production sign-off — what actually happens at each stage, what decisions buyers need to make along the way, and where the process most commonly breaks down. Along the way are the specific, practical habits that experienced sourcing teams use to move through sampling efficiently and arrive at an approved sample that reliably becomes a consistent bulk order.
What Is the Plush Toy Sample Development Process and Why Does It Shape Everything That Follows?
The plush toy sample development process is the structured sequence that carries a product from an approved concept through pattern development, prototype construction, evaluation, and revision, ending in a confirmed sample that serves as the production standard for the entire bulk run. It is rarely a single attempt that succeeds outright — it is an iterative cycle in which each stage narrows the gap between what the buyer imagined and what the factory can consistently produce at scale.
The plush toy sample development process shapes everything that follows because the approved sample becomes the literal reference point every production department works against once bulk manufacturing begins. A sample that is vague, rushed, or approved with unresolved issues does not disappear once production starts — its ambiguities simply resurface, multiplied across thousands of units, at a stage where correction is dramatically more expensive than it would have been during sampling.
Overview of how the sample development process typically unfolds from start to finish:
| Development Stage | What It Accomplishes | Primary Output | Consequence of Rushing It |
|---|---|---|---|
| Brief and reference preparation | Defines exactly what the factory needs to build | A complete, unambiguous development brief | Factory fills gaps with assumptions, not intent |
| Design and materials review | Confirms the concept is technically achievable | Feasibility notes and material proposal | Structural or material problems surface later |
| Pattern development | Converts flat artwork into a 3D cutting structure | Working pattern and cutting templates | Proportion and silhouette errors |
| Prototype construction | Builds the first physical version | First sample | N/A — this is the core deliverable |
| Buyer evaluation | Measures the sample against the brief | Structured, prioritized revision list | Unclear feedback causes extra rounds |
| Revision cycle | Corrects specific, documented deviations | Progressively closer samples | Repeated or circular corrections |
| Counter sample | Confirms bulk conditions can reproduce the approved sample | Pre-production reference standard | Sample-to-bulk quality gaps |
| Final sign-off | Locks the standard for mass production | Approved production reference and tech pack | No objective basis for production QC |
Why Compressing the Timeline Almost Always Backfires
It is a natural instinct to want to move through sampling as quickly as possible — every week spent in development is a week not spent selling. But compressing the sample development timeline by skipping stages, rather than by executing each stage more efficiently, consistently produces the opposite of the intended result.
Each stage in the process exists to close a specific gap between intention and execution. Skip the materials review and a compliance issue may not surface until bulk fabric has already been purchased. Skip a structured evaluation and a proportion error may not be caught until a retail buyer flags it after launch. Skip the counter sample and a color or density shift may only be discovered once several thousand units have already left the production line. Every shortcut simply relocates the cost of the problem to a later, more expensive point in the timeline — it does not remove the cost.
The Compounding Value of a Well-Run Sampling Process
There is a consistent, observable pattern across plush toy sourcing relationships: the more rigorously the sample development stage is run, the more consistent the resulting bulk production becomes. This is not a coincidence — it is a direct result of how factories operate. The approved sample and the documentation built around it are the objective reference every production team member consults when a judgment call needs to be made. The more precise and complete that reference is, the fewer judgment calls are left to individual interpretation, and the tighter the resulting batch-to-batch consistency.
How Do You Prepare a Development Brief That Gives the Sampling Process a Strong Start?
The development brief is the single document with the greatest influence over how accurate the first sample turns out to be. Everything the factory knows about a buyer’s intent, before any physical sample exists, comes from this document — which means every gap, ambiguity, or assumption left in the brief becomes a gap, ambiguity, or assumption baked into the first sample.
A development brief that gives sampling a strong start specifies exact dimensions with tolerances, uses a standardized color reference system rather than descriptive language, defines fabric and filling specifications precisely, documents facial features and embroidery placement with annotated drawings, lists every accessory with attachment method and dimensions, states construction preferences, and sets clear compliance targets for the intended market. The more of this information is settled before the brief reaches the factory, the less interpretation the pattern maker and material sourcer need to apply on their own.
Practical checklist for building a complete plush toy development brief:
| Brief Element | What to Provide | Format That Works Best | What Happens If It’s Missing |
|---|---|---|---|
| Reference artwork | Front, side, and back views of the design | Flat illustration or 3D render | Silhouette and proportion guesswork |
| Size specification | Full dimensions with acceptable tolerance range | Measurement table in centimeters | First sample runs oversized or undersized |
| Color reference | Every color area matched to a code | Pantone TPX/TPG reference | Color revision becomes almost guaranteed |
| Fabric detail | Fabric type, pile height, hand-feel description | Written spec plus a physical swatch | Wrong fabric grade or texture sourced |
| Filling detail | Filling type and target firmness | Written spec plus a compression reference | Product feels too soft, too firm, or lumpy |
| Face and embroidery | Eye size and placement, embroidery artwork | Annotated diagram with coordinates | Expression reads differently than intended |
| Accessories | Every attached item, with size and fixing method | Item list with technical drawing | Wrong parts sourced or placed incorrectly |
| Construction preference | Seam style, closure type, stuffing method | Short written technical note | Non-standard build approach used by default |
| Compliance target | Destination market and applicable safety standards | Written statement | Non-compliant materials selected |
| Packaging notes | Box style, insert, label copy | Reference image or dieline | Packaging diverges from brand expectations |
Tip: Replace Descriptive Color Language With a Standardized Reference Code
Color is consistently the single element most likely to derail a first sample — and the fix is simple. Words like “soft lavender” or “warm cream” carry no fixed meaning between a buyer’s mental image and a factory’s fabric library; each side pictures something different, and the first sample almost always lands somewhere in between. Supplying a Pantone TPX or TPG code for every color area removes that ambiguity entirely, because it points to a specific, physically matchable swatch rather than an impression. Buyers who adopt this single habit consistently report fewer color-related revision rounds than those who continue describing color in prose.
What Actually Happens Inside the Factory Before a Buyer Receives the First Sample?
Between submitting a brief and receiving a first sample, most buyers experience a communication gap — a confirmation email, then silence, then a package. Understanding what happens during that gap is useful not out of curiosity but because it clarifies which factory capabilities most directly determine first sample accuracy, and what questions are worth asking before committing to a manufacturing partner.
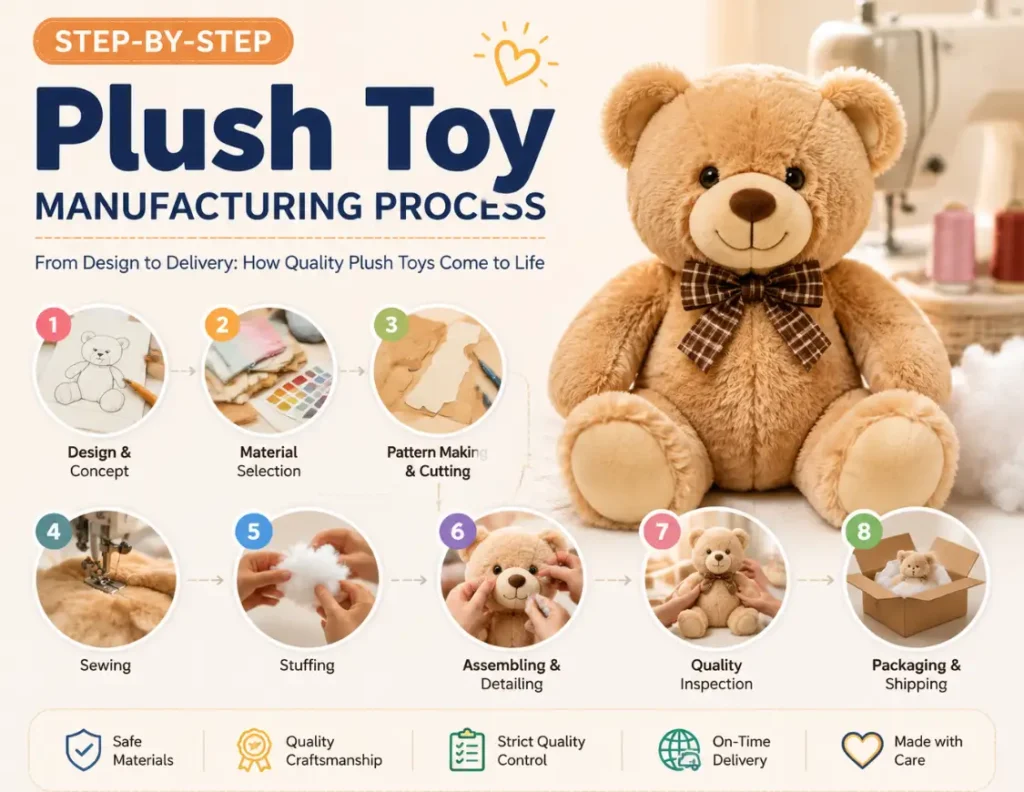
Inside the factory, first sample construction moves through a defined internal sequence: the development team reviews the brief for feasibility and clarity, a dedicated pattern maker converts the design into cutting templates, the purchasing team sources and confirms every specified material, cutters prepare fabric panels from the confirmed pattern, a sampling-specialized sewer hand-constructs the prototype, and an internal QC check compares the finished piece against the brief before it is packed and shipped.
Breakdown of the internal factory process and typical timing for each stage:
| Internal Activity | Responsible Team | What Happens | Typical Duration |
|---|---|---|---|
| Brief review | Product development | Identify ambiguity, flag questions for the buyer | 1–2 days |
| Feasibility check | Development and production | Assess construction difficulty, propose solutions | 1–2 days |
| Pattern development | Dedicated pattern maker | Build 2D cutting templates from the design | 3–6 days |
| Material sourcing | Purchasing team | Confirm and procure specified fabrics and fillings | 3–6 days (parallel) |
| Panel cutting | Cutting team | Cut fabric pieces from the confirmed pattern | 1–2 days |
| Prototype build | Sampling sewer | Hand-assemble the physical sample | 2–5 days |
| Internal QC check | Quality team | Compare finished sample against the brief | 1 day |
| Deviation notes | Development team | Document any known deviations before shipping | 0.5 day |
| Dispatch | Logistics team | Pack and ship with any deviation notes included | 1 day |
Why Pattern Making Is the Stage That Determines Shape Accuracy
Pattern making is arguably the most technically demanding step in the entire sample development sequence, because it involves translating a two-dimensional design concept into a set of fabric panels that, once cut and sewn, form an accurate three-dimensional object. There is rarely a single “correct” way to panel a plush toy shape — different paneling approaches change seam placement, how the fabric’s pile lies across the surface, and the exact silhouette the finished piece takes on.
An experienced pattern maker develops a feel for which approach will best preserve a design’s intended proportions and character, built over repeated exposure to different shapes and fabric behaviors. This is precisely why the depth of experience on a factory’s pattern-making team is one of the most consequential — and most overlooked — factors buyers should evaluate before selecting a manufacturing partner. A factory with seasoned pattern makers routinely produces more accurate first samples, which shortens the entire revision cycle that follows.
Tip: Ask Whether the Factory Runs an Internal QC Check Before Dispatch
Not every factory reviews a sample against the brief before shipping it. Those that do — catching an obvious color mismatch, a crooked accessory, an off-proportion detail, and correcting it internally rather than shipping it as-is — consistently generate less rework for the buyer than those that ship whatever comes off the sampling bench. Asking a prospective factory directly whether an internal QC review happens before dispatch, and what it checks, is a simple qualifying question that reveals a great deal about how mature the factory’s development process actually is. The extra day or two this review adds to dispatch time is almost always recovered in fewer avoidable revision requests later.
How Should a Buyer Evaluate a Sample the Moment It Arrives?
Evaluating a sample well is a skill, not an instinct. Buyers who look at a sample, form a general impression, and send back loosely worded feedback consistently trigger more revision rounds than buyers who work through the sample systematically, document specific deviations, and communicate precise, actionable instructions.
A buyer should evaluate a plush toy sample against a structured checklist covering overall dimensions, silhouette accuracy against the reference artwork, color accuracy against the Pantone codes supplied, fabric quality and hand-feel, stuffing firmness and shape retention, facial feature placement, embroidery and stitch quality, seam integrity, accessory attachment strength, overall finishing, and label accuracy. Every point of deviation should be measured or photographed and recorded before any feedback is compiled and sent.
Structured checklist for evaluating a first plush toy sample:
| Evaluation Category | What to Check | How to Document It | Typical Issue Found |
|---|---|---|---|
| Overall size | Measure height, width, and key proportions | Measure against the brief’s tolerances | Product runs larger or smaller than spec |
| Silhouette | Compare the outline to the reference artwork | Side-by-side marked-up photo | Uneven proportions or shape drift |
| Color | Compare each area to its Pantone reference | Photo taken under standardized lighting | Shade too warm, too cool, or under-saturated |
| Fabric feel and quality | Assess pile height, density, surface texture | Written notes with close-up photos | Shorter pile or thinner density than expected |
| Stuffing firmness | Press and release to test firmness and recovery | Written comparison to the target reference | Too soft, too firm, or unevenly distributed |
| Facial features | Measure position against the brief’s coordinates | Annotated photo with measurements | Eyes or nose placed off-center |
| Embroidery | Check thread tension, color match, line clarity | Close-up photos from several angles | Uneven tension or slightly mismatched color |
| Seams | Inspect every seam under light tension | Photos of any weak or visible seams | Loose stitching or exposed thread |
| Accessories | Physically test the pull strength of every attachment | Written result of the pull test | Loosely secured eyes, bows, or tags |
| Finishing | Look for loose threads or surface marks | Annotated photos of any defects | Stray threads or visible marks |
| Labeling | Confirm care label and compliance label content | Photo with content cross-checked | Wrong or missing compliance information |
Tip: Evaluate Color Under Standardized Lighting, Not Whatever Light Is Available
Color is the single most disputed and most conditions-sensitive quality dimension in sample evaluation. The same fabric can look noticeably different under warm indoor lighting, cool office fluorescents, and natural daylight — which means two people evaluating the same sample under different light sources can genuinely be seeing different colors, without either being wrong. The accepted standard for color-critical review is D65 daylight-equivalent lighting, which provides a consistent, repeatable basis for comparison. Evaluating under this standard — and telling the factory that this is the condition under which feedback was generated — removes one of the most common and most frustrating sources of back-and-forth disagreement in the revision process.
How Are Revision Rounds Managed So They Converge Quickly Instead of Dragging On?
Revision rounds are a normal, expected part of sampling — no sample is realistically approved without at least one round of correction. The goal is never to eliminate revisions entirely; it is to make each round count, so that three focused rounds accomplish what an unfocused process might take six rounds to achieve.
Revision rounds converge efficiently when feedback is comprehensive and consolidated into a single document per round, revision notes are specific and measurable rather than impressionistic, the factory confirms its understanding of each requested change before starting work, changes are tracked cumulatively so nothing already approved gets silently reopened, and items are clearly prioritized so the factory addresses the most consequential issues first.
Framework for keeping revision rounds efficient:
| Practice | Problem It Prevents | How to Apply It |
|---|---|---|
| Single consolidated feedback document | Multiple partial rounds for the same underlying issues | Gather all input before sending anything to the factory |
| Specific, measurable notes | Factory correcting the wrong aspect of an issue | Include exact measurements, Pantone codes, annotated photos |
| Factory confirmation before work starts | Revision instructions misread or misapplied | Ask the factory to restate the planned corrections back |
| Cumulative change tracking | Previously approved elements being reopened later | Keep a running change log across every round |
| Formal partial sign-off | Re-litigating settled details in a later round | Confirm each resolved element as approved in writing |
| Clear priority labeling | Minor cosmetic details delaying structural fixes | Mark each item as critical, moderate, or minor |
Tip: Write Revision Notes With Numbers, Not Impressions
The single biggest lever for shortening the revision cycle is the precision of the feedback itself. A note that says “the face feels off” gives the factory nothing concrete to act on — it might come back adjusted in a way that addresses a completely different concern than the one the buyer had in mind. A note that says “the left eye sits roughly 3–4mm too low relative to the nose bridge — please align to the coordinate marked in the attached photo; the right eye position is approved as-is” leaves no room for misinterpretation. The more a revision note reads like a measurable instruction rather than a general impression, the more likely the next sample resolves the issue on the first attempt.
Managing Open Items Across Multiple Rounds
As a sample moves through several rounds of revision, keeping track of what has been approved, what is still open, and what was newly raised in the most recent round becomes genuinely difficult without a system. Two failure patterns show up repeatedly when there is no tracking mechanism: previously approved details get second-guessed and reopened for no clear reason, and issues flagged early on quietly get dropped once later-round issues take over the conversation.
A simple shared log — listing each item, the round it was raised in, the requested action, the factory’s response, and its current approval status — solves both problems at once. It becomes the single point of reference for the entire revision history, and it removes the ambiguity that otherwise causes rounds to circle back on themselves.
What Is a Counter Sample and Why Does It Matter Before Bulk Production Begins?
The counter sample is one of the most valuable and, at the same time, most frequently skipped steps in the entire sample development process. It sits between the final approved development sample and the start of bulk manufacturing, and its purpose is narrow but critical: confirm that the approved design can actually be reproduced under real production conditions — not just under the carefully controlled conditions of a development sampling bench.
A counter sample is a pre-production prototype built using the actual bulk-purchased materials and the real production workflow, rather than the small-batch materials and hand-built process typical of earlier development samples. Its purpose is to catch any gap between what was approved on paper and what the factory floor can consistently reproduce, before that gap has a chance to appear across an entire production run. A counter sample that matches the approved standard gives both sides real confidence heading into bulk production. A counter sample that reveals a discrepancy — in fabric batch, stuffing consistency, or process behavior — allows that discrepancy to be corrected while it still only affects one sample, not thousands of finished units.
Comparison of what a development sample confirms versus what a counter sample confirms:
| Confirmation Point | Development Sample | Counter Sample |
|---|---|---|
| Design correctly interpreted | Yes | Not the primary purpose |
| Materials match specification | Yes, at small scale | Confirms bulk-purchased material batch matches |
| Shape and proportion accuracy | Yes | Confirms production line replicates the pattern |
| Color accuracy | Yes, against Pantone reference | Confirms bulk fabric dye lot still matches |
| Built using actual production process | No — typically hand-built in development | Yes — built under real production conditions |
| Confirms bulk material batch | No | Yes |
| Confirms production-line consistency | Cannot confirm this | This is its core purpose |
Tip: Never Skip the Counter Sample, Even When the Timeline Is Tight
The most commonly skipped stage in the entire sampling sequence is the counter sample — usually cut for the sake of shaving a week or two off the launch timeline. This is consistently a false economy. The deviations a counter sample would have caught do not vanish when the step is skipped; they simply surface later, inside a completed bulk order, where correcting them costs far more in reworked units, delayed shipments, and damaged trust than the original counter sample fee ever would have.
A counter sample typically adds one additional sample fee and one to two weeks to the schedule — an investment that is almost always recovered several times over in avoided rework, especially on a first order with a new factory, a design with several risk points, or any run large enough that batch-level inconsistency would be expensive to fix after the fact.
What a Counter Sample Most Commonly Reveals
When a counter sample does surface a problem, it is almost always one of three familiar patterns: a color shift between the approved sample’s fabric and the bulk-purchased dye lot, even when both were ordered from the same supplier; a stuffing firmness difference between hand-stuffed development samples and machine-stuffed bulk production; or a subtle material quality difference between a small development-stage material order and the larger bulk purchase.
Each of these is straightforward to fix at the counter sample stage — adjusting a dye lot, recalibrating a stuffing machine, substituting a material batch — and prohibitively expensive to fix once several thousand units already reflect the problem.
How Does an Approved Sample Become a Reliable Standard for Mass Production?
Approval is not the finish line of the sampling process — it is the handoff point between development and production. What makes an approved sample valuable is not simply that the design is correct; it is that the sample, together with its documentation, becomes the objective reference every production team measures against for the life of the order. How completely that reference is documented and communicated determines how faithfully bulk production reproduces it.
An approved sample becomes a reliable mass production standard through four connected mechanisms: a complete tech pack that translates the sample into measurable written specifications, the physical sample itself retained on the factory floor as a tactile and visual reference, department-specific work instructions built from that reference, and defined QC pass/fail criteria applied at each inspection point. Together, these four elements close the gap between what was approved in the sample room and what actually comes off the production line.
How each mechanism functions in translating an approved sample into consistent production:
| Mechanism | What It Captures | Primary User | How It Reduces Inconsistency |
|---|---|---|---|
| Tech pack | Every measurable specification in written form | All production departments | Gives an objective reference instead of memory or assumption |
| Physical approved sample | Visual and tactile reference standard | QC inspectors, line supervisors | Provides a direct, side-by-side comparison point |
| Work instructions | Step-by-step build procedure | Line operators | Narrows the range of individual interpretation |
| QC pass/fail criteria | Objective thresholds at each checkpoint | QC inspectors | Turns subjective judgment into a defined standard |
| Reference range set | Boundaries of acceptable natural variation | QC inspectors | Distinguishes real defects from normal material variance |
Why the Tech Pack Is the Document That Holds Everything Together
The tech pack is the most important document in the transition from sample to bulk production. It converts the physical approved sample into a written reference that every department can consult independently, without needing to physically compare their own work against the sample at every step of the line.
A complete plush toy tech pack includes overall dimensions with acceptable tolerances, fabric specifications including pile height and density, filling type and target firmness, Pantone references for every color area, embroidery coordinates, a full accessory list with attachment methods, construction notes on seam type and stuffing approach, and a defined set of QC checkpoints with clear pass/fail criteria. The completeness of this document has a direct, visible effect on bulk consistency: where specifications are precise, production decisions are made against fixed criteria; where they are vague, decisions default to individual interpretation, and interpretation varies from operator to operator.
Keeping the Physical Sample on the Production Floor
The physical approved sample — ideally the approved counter sample, since it reflects real production conditions — should stay on the factory floor for the entire duration of the run, kept accessible at the QC inspection point, properly protected from light and compression damage, and used as the primary visual comparison during first-off inspection and routine in-process checks. For buyers who want visibility into whether this is actually happening, requesting a photo of the reference sample positioned at the QC station alongside a first-off inspection unit is a reasonable request — and a factory’s willingness to provide it readily is itself a useful signal about how seriously the reference standard is treated on the floor.
What Mistakes Most Commonly Delay Sampling and Push Up Its Cost?
Understanding the sampling process in theory is useful, but the more actionable knowledge is recognizing the specific mistakes that repeatedly derail it in practice — because these mistakes follow recognizable patterns across different buyers, different factories, and different product categories.
The most common sampling mistakes fall into four broad categories: brief preparation errors that seed misinterpretation from the outset, evaluation errors that let issues accumulate unnoticed, communication errors that make revision requests ambiguous, and process management errors that allow the design or the standard itself to drift between rounds.
Overview of the most frequent mistakes and how to avoid each one:
| Category | Common Mistake | Resulting Consequence | How to Avoid It |
|---|---|---|---|
| Brief preparation | No Pantone reference provided for colors | Color revision needed in nearly every round | Include a Pantone code for every color area |
| Brief preparation | Dimensions described in words rather than measured | Repeated sizing corrections | Provide a measurement table with clear tolerances |
| Brief preparation | Materials specified only in text | Wrong fabric or filling sourced | Send physical swatches alongside the written brief |
| Brief preparation | Internal stakeholders not aligned before submission | Design changes mid-development | Confirm full internal agreement before briefing the factory |
| Sample evaluation | Reviewed under mismatched or inconsistent lighting | Color problems missed or falsely flagged | Standardize on D65 lighting for every review |
| Sample evaluation | No physical measurement against the brief | Dimensional issues go unnoticed | Measure every key dimension before writing feedback |
| Sample evaluation | Accessories not pull-tested | Attachment weaknesses discovered too late | Physically test every attached component |
| Communication | Feedback arrives from multiple people separately | Factory receives conflicting instructions | Route all feedback through one consolidated document |
| Communication | Revision notes are vague or impressionistic | Wrong aspect of an issue gets corrected | Write specific, measurable, annotated instructions |
| Communication | Factory’s understanding never confirmed | Revisions proceed on a different interpretation | Ask the factory to confirm the action plan before work begins |
| Process management | Design direction shifts mid-round | Earlier development work becomes unusable | Freeze the design fully before sampling starts |
| Process management | No tracking of what has already been approved | Settled issues get reopened unnecessarily | Maintain a running, shared change log |
| Process management | Counter sample skipped to save time | Sample-to-bulk inconsistency in production | Treat the counter sample as a mandatory step |
The Cost of Skipping a Design Freeze
One of the more damaging and more common process failures is starting sampling without a formal design freeze — an internal decision that the concept is finished and no fundamental changes will be introduced once physical development begins. Without this discipline, buyers sometimes treat the sampling stage as an extension of the design exploration phase, making meaningful changes to proportion, character, or material direction only after seeing a physical sample rather than resolving those questions beforehand.
Every such change effectively restarts sampling for the affected elements, consuming additional fees, additional weeks, and additional goodwill with the factory. Design exploration belongs before the brief is written; physical sampling should exist to confirm that a finished design can be built accurately, not to discover what that design should be.
Conclusion
Sample development is not a procedural formality wedged between concept and mass production — it is the stage where quality is actually built into a plush toy, where mistakes are found and corrected while they are still cheap to fix, and where the exact standard that will govern an entire bulk order is defined, tested, and locked in. Buyers who invest real attention here — writing precise briefs, evaluating samples methodically, giving the factory specific and measurable feedback, and insisting on a counter sample before bulk production starts — consistently end up with better products, shorter overall timelines, and lower total development cost than buyers who treat sampling as a box to check as quickly as possible.
Manufacturing partners differ meaningfully in how disciplined their internal sampling process is, and that difference shows up directly in first sample accuracy, revision efficiency, and how reliably an approved sample translates into a consistent bulk run. Teams such as Xing Wang Plushie that build counter sample confirmation and a documented tech pack into every order as standard practice tend to see noticeably fewer surprises once bulk production begins — which is, ultimately, the entire point of running the sampling process properly in the first place.
The framework in this guide — a precise brief, a systematic evaluation habit, disciplined revision management, and a counter sample that is never skipped — is not complicated to apply. What it requires is treating sample development as the foundation of the entire order rather than an obstacle standing between a design and a launch date, and giving it the time and structure that a foundation deserves.
FAQ
Q1: Is it realistic to approve a sample based only on photos and video, without physically receiving it first?
Remote approval based on photos and video is possible, and buyers facing tight timelines or long shipping distances sometimes rely on it — but it comes with real limitations that are worth understanding before leaning on it too heavily. Photographs cannot reliably convey stuffing firmness, fabric hand-feel, or overall weight, all of which are core quality attributes of a plush toy. Color reproduction through photography is also notoriously inconsistent, since camera sensors, ambient lighting, and screen calibration all distort how a color actually appears on screen. And structural qualities — how securely an accessory is attached, how strong a seam is — simply cannot be verified without physically handling the piece. Remote review works reasonably well as a preliminary screen for shape, proportion, and general layout, but for anything involving texture, firmness, or physical durability, there is no substitute for having the actual sample in hand before signing off.
Q2: What should a buyer do if the first sample is so far off the brief that it needs to be rebuilt entirely rather than revised?
Before commissioning a full rebuild, it is worth stepping back and diagnosing why the deviation happened. Compare the sample carefully against the original brief and determine whether the factory misread a clearly specified requirement or filled in genuine ambiguity in the brief with its own assumptions. If the brief was precise and the result still diverged significantly without explanation, ask the factory directly to walk through how they interpreted the brief — the answer will usually reveal whether this is a communication problem or a genuine capability gap. If the brief did have real ambiguity that contributed to the outcome, close those gaps thoroughly before requesting a rebuild. In either case, asking for a progress photo or short video before the rebuilt sample ships can catch a second miss early, rather than losing another full international shipping cycle to a sample that still falls short.
Q3: Can multiple colorways of the same design be sampled at the same time to save development time?
Yes, and this is a common and effective way to compress the overall timeline for a product planned to launch in several color variants. Once the core design, construction, and proportions are approved in a primary colorway, additional colorways typically require only a material and color swap rather than a full re-evaluation of pattern and structure, which makes them considerably faster to develop. The most efficient approach is to fully lock in the primary colorway — design, construction, and every non-color detail — and then develop the remaining colorways in parallel with the counter sample stage of the primary version. Handled this way, a multi-colorway launch can often be compressed by several weeks compared to developing each colorway one after another.
Q4: What is the best way to store and reference approved samples for future reorders?
Approved samples should be labeled clearly with the product name, colorway, approval date, and the specific order they belong to, and stored somewhere clean and stable, away from direct light, humidity, and compression — all of which can subtly shift fabric color or stuffing firmness over time. For buyers who reorder the same designs across multiple seasons, keeping an organized reference library of approved samples by product code gives a far more reliable basis for confirming consistency on reorders than relying on a factory’s institutional memory of what was approved previously. Before each reorder ships, comparing new bulk material swatches directly against the archived sample is the most dependable way to catch batch drift before it affects the finished units.
Q5: Does the sampling process take longer with a brand-new factory compared to one with an established working relationship?
Generally, yes. Sampling with a new factory tends to require more time and more revision rounds than the same process with a factory that already understands a buyer’s standards, even for a similarly complex product. This is simply because a new partner is building its understanding of expectations, tolerances, and communication style from a standing start, while an established partner already carries that knowledge from prior orders. With a first-time factory, it is worth investing extra care in brief preparation, being unusually explicit about tolerances and quality expectations, and setting realistic expectations that first sample accuracy may be lower than it would be with a long-term partner. Across repeated orders with the same factory, sampling consistently gets faster and tighter as institutional familiarity builds — one of the more concrete, practical arguments for favoring long-term manufacturing relationships over frequently switching factories in search of marginal price differences.