Skip to content
Everything brand owners, product managers, and procurement teams need to know about how a custom plush toy moves from an idea to a finished, shippable product — brief preparation, factory evaluation, sampling, safety compliance, mass production, and final quality control.
Custom plush toy development looks simple from the outside. A buyer has an idea, sends it to a factory, and a box of finished toys arrives a few months later. In practice, the path between those two points is a structured, multi-stage workflow with dozens of decision points — and the outcome of the finished product is determined almost entirely by how well each of those stages is executed, not by luck or by which factory happens to be selected.
Buyers who understand the full custom plush toy development workflow enter the process with realistic expectations, ask the right questions at the right stages, and avoid the majority of delays, cost overruns, and quality disputes that derail first-time development projects. Buyers who do not understand the workflow tend to discover its stages the hard way — through missed deadlines, unexpected revision fees, and finished goods that do not match what they originally imagined.
This guide walks through the entire custom plush toy development workflow from first concept to final shipment, explaining what happens at each stage, what buyers are responsible for providing, and where the most common risks occur. It is written for anyone approaching a custom plush toy manufacturing project for the first time, as well as experienced buyers who want to tighten and de-risk a process they already know.
What Is the Custom Plush Toy Development Workflow?
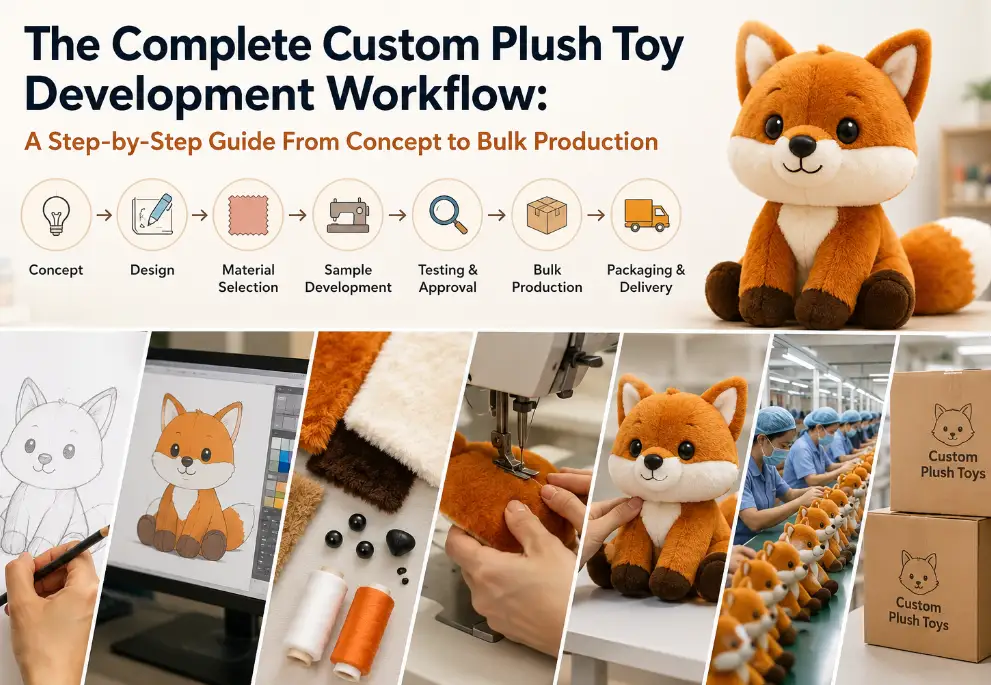
The custom plush toy development workflow is the complete sequence of stages a plush product moves through between initial concept and finished, shipped goods. It spans concept definition, factory selection, technical development, physical sampling, safety compliance, mass production, quality control, and logistics. Unlike a simple purchase order for an off-the-shelf product, custom plush toy development requires active buyer participation at nearly every stage — the factory cannot produce an accurate result without clear, timely input from the buyer at each checkpoint.
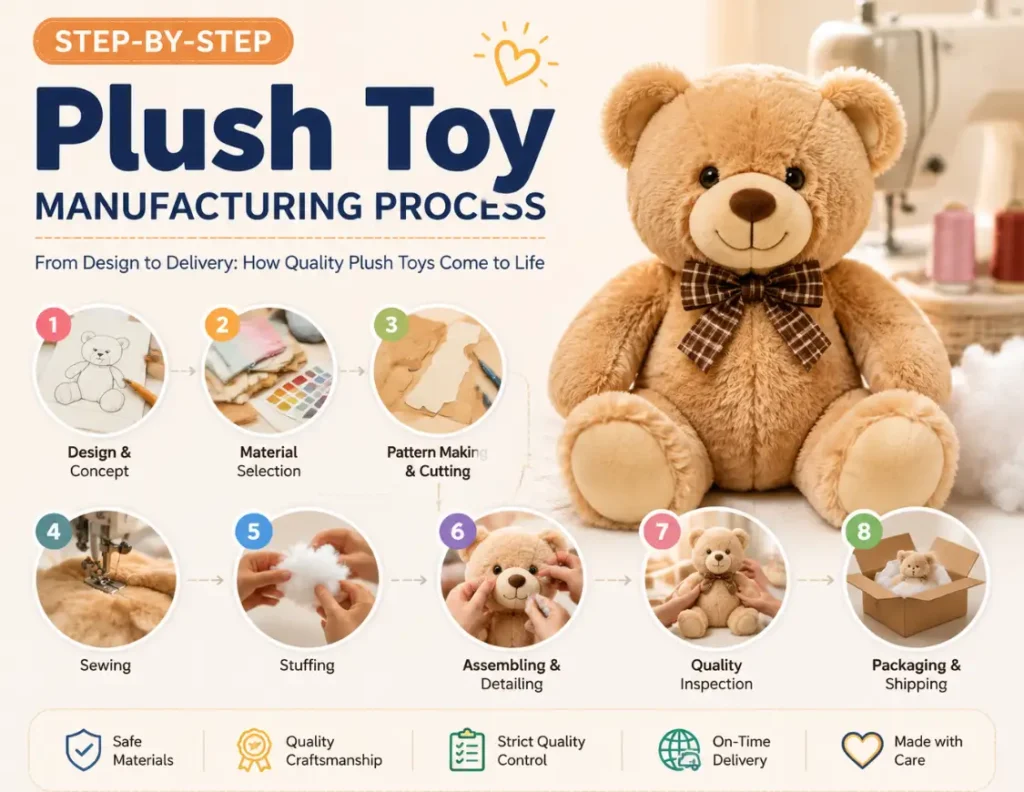
The workflow is best understood as eight connected phases, each with its own purpose, deliverables, and typical timeline. Skipping or rushing any one phase does not remove the risk that phase was designed to manage — it simply defers that risk to a later, more expensive point in the process, usually bulk production or final shipment, where correcting a problem costs far more than it would have at the earlier stage.
The Eight Phases of the Custom Plush Toy Development Workflow
| Phase | Primary Objective | Key Deliverable | Typical Duration |
|---|---|---|---|
| 1. Concept & Design Brief | Define product requirements precisely | Complete design brief and reference package | 1–3 weeks |
| 2. Factory Evaluation & Quoting | Select a qualified manufacturing partner | Signed manufacturing agreement | 1–2 weeks |
| 3. Pattern Making & Material Sourcing | Translate design into production-ready inputs | Approved patterns and confirmed materials | 1–2 weeks |
| 4. Sampling & Revision Rounds | Build and refine a physical prototype | Approved development sample | 3–6 weeks |
| 5. Counter Sample & Safety Testing | Confirm bulk-readiness and compliance | Approved counter sample, test reports | 2–3 weeks |
| 6. Mass Production | Manufacture the full order quantity | Completed production run | 25–45 days (order-dependent) |
| 7. Final Inspection & QC | Verify finished goods meet standard | Inspection report, sign-off | 1–3 days |
| 8. Packaging & Shipping | Prepare and deliver finished goods | Shipped, documented order | 2–8 weeks (mode-dependent) |
These eight phases are sequential but not entirely rigid — safety testing preparation, for example, can begin during sampling rather than waiting until it is formally scheduled, and packaging artwork can be finalized while mass production is underway. Understanding where overlap is possible is one of the more effective ways experienced buyers compress total development timelines without cutting corners on any individual phase.
Phase 1: Concept Definition and Design Brief Preparation
Every custom plush toy development project begins with a concept — a character sketch, a mascot design, a licensed IP interpretation, or a functional product idea like a weighted comfort toy or a scented sleep companion. The design brief is the document that translates that concept into something a factory can act on without guessing. It is, without exception, the single highest-leverage document in the entire workflow, because every downstream stage inherits the accuracy — or the ambiguity — of what the brief specifies.
A complete design brief for custom plush toy manufacturing includes front, back, and side reference artwork; precise overall dimensions with tolerances; Pantone color references for every color area; fabric type and pile height specifications; filling type and target density; detailed facial feature and embroidery placement; any accessory specifications with attachment method; construction notes; target market and applicable safety standards; and packaging requirements. Buyers who submit a brief with gaps in any of these categories should expect the factory to fill those gaps with its own assumptions — assumptions that rarely match the buyer’s actual intent.
Design Brief Components and Their Impact on First Sample Accuracy
| Brief Element | Recommended Format | Consequence If Vague |
|---|---|---|
| Reference artwork | Front/back/side flat illustration or 3D render | Shape and proportion misinterpretation |
| Dimensions | Measurement table in cm with tolerances | Sample built to wrong scale |
| Color | Pantone TPX/TPG code per color area | Color revision required in nearly every round |
| Fabric | Written spec plus physical swatch | Wrong pile height, hand-feel, or fabric family sourced |
| Filling | Fiber type and target density (g per unit) | Sample feels too soft, too firm, or uneven |
| Facial features | Annotated diagram with coordinates | Expression reads differently than intended |
| Accessories | Item list with dimensions and attachment method | Wrong parts sourced or incorrectly attached |
| Compliance target | Named standard (e.g., ASTM F963, EN71) | Non-compliant materials selected by default |
Tip: Never describe a color in natural language alone. Words like “warm beige” or “dusty rose” are interpreted differently by every person who reads them, and a factory sourcing team will inevitably land on a shade that is close but not correct. Always attach a Pantone TPX or TPG code to every color area in the brief, and where possible, send a physical fabric swatch alongside the digital file. This single habit consistently eliminates the color-related revision round that appears in the majority of first-time development projects, saving at least one full sampling cycle — typically one to two weeks — before the first sample is even built.
Beyond the written brief, physical reference materials meaningfully improve first sample accuracy. A fabric swatch communicates texture and hand-feel in a way no written description can. A compression sample of the target stuffing firmness gives the factory’s material team a tangible benchmark. A market example of a comparable finished product — even from a competitor — helps calibrate the overall quality tier the buyer expects. Buyers who invest a small amount of time and shipping cost in physical references before the brief is submitted consistently receive more accurate first samples than those relying on digital files and written descriptions alone.
Phase 2: Factory Evaluation and Quote Comparison
Once the concept and brief are ready, the next phase is selecting a manufacturing partner. This is where many first-time buyers make decisions based primarily on unit price — a mistake that becomes apparent only after production has already begun and quality or communication problems surface. Comparing plush toy manufacturing quotes correctly requires looking well beyond the per-unit number to the assumptions embedded inside it.
A useful quote comparison separates cost into its component parts: fabric and filling material cost, labor and construction complexity, tooling or mold costs for any hard components, accessory costs, safety testing and certification fees, packaging costs, and freight. Two quotes that appear close on the headline unit price can differ significantly once these components are itemized — one factory may have quoted a lower-grade fabric, omitted testing fees, or assumed a lower minimum order quantity that changes the effective per-unit economics at the buyer’s actual volume.

What to Compare When Evaluating Multiple Plush Toy Manufacturing Quotes
| Comparison Category | What to Request | Why It Matters |
|---|---|---|
| Fabric grade specified | Fabric name, composition, pile height, GSM | Lower-grade fabric drives lower quotes but reduces durability |
| Filling density assumed | Target density in grams per unit | Under-filled samples feel cheap and lose shape faster |
| Sample fee and policy | Sample cost, whether it is credited to bulk order | Affects true upfront development cost |
| Testing fees included | Which safety tests are quoted, which are extra | Compliance testing is not optional in most markets |
| MOQ and price breaks | Minimum order quantity at the quoted price | Determines whether the quote is achievable at target volume |
| Lead time quoted | Sampling and bulk production lead times separately | Unrealistic lead times often signal capacity strain |
| Payment terms | Deposit percentage, balance timing | Affects cash flow and leverage during production |
Tip: Request an itemized quote rather than a single per-unit number, and ask every factory under consideration to quote against the identical specification sheet. When quotes are based on slightly different assumptions about fabric grade, filling density, or included testing, the numbers are not actually comparable, no matter how close they appear on paper. An itemized breakdown also makes it far easier to negotiate — buyers who ask “what specifically changes if we move to a slightly lower pile height” get a clear answer, while buyers who only see one blended number have no way to identify where the flexibility actually exists.
Assessing Manufacturer Reliability Beyond the Quote
Price comparison should run alongside — not instead of — an assessment of the factory’s underlying reliability. A manufacturer that offers the lowest quote but lacks a mature sampling process, in-house pattern making capability, or a documented quality control system is a poor choice regardless of the number on the page, because the hidden costs of an unreliable partner — revision cycles, missed deadlines, inconsistent bulk quality — routinely exceed any savings on unit price.
Reliable indicators include how detailed and specific the factory’s questions are about the design brief (vague acceptance of an ambiguous brief is a warning sign, not a convenience), whether the factory has in-house pattern makers rather than outsourcing this function, whether a documented QC process is described without being asked, and whether references or verifiable production photos from comparable past projects are readily available. A factory that struggles to answer these questions clearly before an order is placed will not suddenly develop that clarity once a deposit has been paid.
Phase 3: Pattern Making and Material Sourcing
With a factory selected and the brief finalized, technical development begins. This phase converts the two-dimensional design brief into the physical inputs a sample builder needs: cutting patterns and confirmed materials. It happens largely inside the factory, invisible to the buyer, but its quality determines how closely the first physical sample will match the original design intent.
Pattern making is a genuine engineering discipline. A pattern maker is solving the problem of how a set of flat fabric panels, once cut, sewn, and stuffed, will produce a specific three-dimensional shape with correct proportions, a natural silhouette, and consistent pile direction across seams. There is rarely a single correct paneling solution for a given design — different approaches produce different seam placements and different final forms — which means the experience level of a factory’s pattern making team has an outsized effect on first sample accuracy.
Material sourcing runs in parallel with pattern making. The purchasing team sources fabric, filling, safety eyes or embroidery thread, and any accessories against the specifications in the brief, confirming availability, lead time, and — critically — compliance status for the buyer’s target market before cutting begins.
Pattern Making and Material Sourcing Activities and Typical Timelines
| Activity | Responsible Team | Typical Duration | Common Risk |
|---|---|---|---|
| Brief review and feasibility check | Product development | 1–2 days | Ambiguities not flagged before pattern work begins |
| Pattern development | Specialized pattern maker | 3–7 days | Proportion or silhouette drift from reference art |
| Fabric sourcing and confirmation | Purchasing/sourcing team | 3–7 days (parallel) | Substituted fabric that does not match spec |
| Filling and accessory sourcing | Purchasing team | 3–7 days (parallel) | Non-compliant filling for target market |
| Panel cutting | Cutting team | 1–2 days | Fabric grain/pile direction inconsistency |
Phase 4: The Sampling Process and Revision Rounds
Sampling is the phase most buyers associate with custom plush toy development, and for good reason — it is where the concept becomes tangible for the first time, and where the majority of the buyer’s active decision-making occurs. The sampling phase typically includes a first sample build, structured buyer evaluation, one or more revision rounds, and — for any order proceeding to meaningful volume — a counter sample built under actual bulk production conditions.
Evaluating a first sample effectively requires a systematic approach rather than an impressionistic one. Buyers who simply look at a sample and decide it “doesn’t feel quite right” generate vague feedback that produces additional, avoidable revision rounds. A structured evaluation checks overall dimensions against the spec, shape and silhouette against the reference art, color against the Pantone references under D65 standard lighting, fabric pile and density, stuffing firmness, facial feature placement, stitching integrity, and accessory attachment strength with an actual pull test.
Sample Evaluation Checklist by Assessment Area
| Assessment Area | Method | Common Deviation Found |
|---|---|---|
| Overall dimensions | Physical measurement vs. spec table | Height or width off by more than tolerance |
| Color accuracy | Compare to Pantone swatch under D65 light | Shade too warm, too cool, or under-saturated |
| Fabric quality | Pile height and density check, hand-feel test | Shorter pile or lower density than approved swatch |
| Stuffing firmness | Compression and release test | Too soft, too firm, or unevenly distributed |
| Facial feature placement | Measurement against coordinate spec | Eyes, nose, or mouth mispositioned by a few mm |
| Accessory attachment | Manual pull test to failure threshold | Attachment strength below safety requirement |
| Stitching and seams | Visual inspection under tension | Loose stitching or visible seam gaps |
Tip: Write revision notes as specific, measurable instructions rather than general impressions. Instead of noting that “the face looks off,” write something closer to “left eye is positioned 4mm too low relative to the nose bridge — raise to align with the coordinate marked on the attached annotated photo; right eye placement is approved as-is.” Specific, reference-supported feedback removes interpretation from the factory’s side entirely, which is the single most effective way to reduce the total number of revision rounds a sample requires before approval.
Why the Counter Sample Cannot Be Skipped
Once a development sample is approved, the temptation is to move straight to bulk production. This is one of the most common and most costly workflow mistakes in custom plush toy manufacturing. A counter sample — a pre-production prototype built using the actual bulk fabric batch, filling machinery, and production-line process — confirms that what was approved under careful development conditions can actually be replicated at scale.
Counter samples most often reveal three categories of deviation: a dye-lot color difference between the development fabric and the bulk fabric batch, a firmness difference between hand-stuffing used in sampling and machine-stuffing used on the production line, and subtle material quality differences in bulk-quantity sourcing versus small-quantity development sourcing. Every one of these deviations is inexpensive to correct before bulk production starts and expensive to correct — or impossible to correct — after thousands of units have already been produced.

How Communication Cadence Affects Sampling Speed
Beyond the technical mechanics of pattern making, material sourcing, and revision tracking, the sampling phase is heavily influenced by something less often discussed: the cadence and consolidation of buyer-side communication. Factories work most efficiently when they receive one clear, comprehensive round of feedback per evaluation cycle rather than a trickle of messages spread across several days as different internal stakeholders review the sample independently.
A common and avoidable pattern in first-time development projects looks like this: the buyer’s product manager reviews the sample and sends initial feedback. Two days later, a brand partner reviews the same sample and raises additional concerns that were visible from the start but were not included in the first message. A few days after that, a third stakeholder — perhaps someone on the retail or licensing side — adds a final round of comments. From the factory’s perspective, this looks like three separate revision requests rather than one, and each new message risks reopening work that had already been started or completed based on the earlier, incomplete instructions.
The fix is organizational rather than technical: establish a single internal review deadline before any feedback is sent to the factory, and designate one point of contact responsible for consolidating input from every stakeholder into a single, prioritized document. The time spent coordinating this internal alignment is consistently shorter than the time lost to an additional, avoidable revision round caused by fragmented communication — and it has a compounding effect, since every unnecessary round also pushes back the counter sample, safety testing, and ultimately the mass production start date.
Managing Multiple Design Variants During Sampling
Many custom plush toy projects involve more than a single design — a product line with several characters, or a single character offered in more than one colorway or size. Developing these variants sequentially, waiting for full approval of one before starting the next, is rarely the most efficient path. Once the base design, construction method, and primary colorway are approved, subsequent colorway or size variants typically require only targeted revisions rather than a full restart of the pattern-making and evaluation process.
The more efficient approach is to fully lock the base design — pattern, construction, and non-color specifications — before branching into variants, and then develop the remaining colorways or sizes in parallel with the counter sample stage of the primary variant. This parallel structure can meaningfully shorten the total development timeline for a multi-SKU launch compared to a strictly sequential approach, since the technical risk that consumes the most time — pattern accuracy and construction method — is resolved once and then reused across every subsequent variant.
Phase 5: Safety Compliance and Product Testing
Plush toys are children’s products in the vast majority of target markets, which means safety compliance is not an optional add-on to the development workflow — it is a mandatory phase with real legal and commercial consequences if skipped or handled superficially. The specific standards that apply depend on the destination market, but common frameworks include ASTM F963 in the United States, EN71 (Parts 1, 2, and 3) in the European Union, and equivalent national standards elsewhere.
Safety testing for custom plush toys typically covers mechanical and physical hazards (small parts, sharp points, cord and drawstring length), flammability, and chemical safety (heavy metals, phthalates, and other restricted substances in dyes, fabrics, and filling). Independent, third-party laboratory testing — rather than relying solely on the factory’s internal claims — is the standard practice for any product entering a regulated retail or e-commerce channel.

Common Plush Toy Safety Testing Requirements by Category
| Test Category | What It Evaluates | Typical Standard Reference |
|---|---|---|
| Mechanical/physical hazards | Small parts, sharp edges, torque and tension resistance | ASTM F963 / EN71-1 |
| Flammability | Burn rate of fabric and filling materials | 16 CFR 1610 / EN71-2 |
| Chemical safety | Heavy metals, phthalates, restricted dyes | EN71-3 / CPSIA |
| Accessory pull testing | Attachment strength of eyes, bows, and appliqués | ASTM F963 tension test |
| Age-grading assessment | Suitability of small parts for intended age range | ASTM F963 / EN71-1 |
Tip: Schedule safety and compliance testing during the sampling phase rather than waiting until after the counter sample is approved. Requesting test reports on the development sample or an early production sample surfaces material or construction issues — a filling that does not meet a flammability standard, or an accessory attachment that fails a pull test threshold — while corrections are still cheap and fast to make. Buyers who wait until the counter sample stage to begin testing routinely discover compliance issues at the worst possible point in the timeline, just before bulk production is scheduled to start.
Phase 6: Mass Production and In-Process Quality Control
With the counter sample and safety testing both approved, the order moves into mass production. This phase is the most capital-intensive part of the workflow and the one where the accumulated quality of every prior phase either pays off or breaks down at scale. A factory with a complete tech pack, an approved physical reference sample retained at the QC station, and clear work instructions for every production department will replicate the approved standard consistently. A factory working from incomplete documentation will produce increasing variation as the run progresses.
Effective in-process quality control during mass production typically includes a first-off inspection before full-line production begins, in-process spot checks at defined intervals throughout the run, and department-level checkpoints — cutting, sewing, stuffing, finishing — each verified against the tech pack before work moves to the next stage.
In-Process Quality Control Checkpoints During Mass Production
| Checkpoint | Stage of Production | What Is Verified |
|---|---|---|
| First-off inspection | Before full-line production starts | First finished units match the counter sample exactly |
| Cutting checkpoint | After fabric panels are cut | Panel dimensions and pile direction consistency |
| Sewing checkpoint | During assembly | Seam strength, stitching density, construction accuracy |
| Stuffing checkpoint | During filling | Firmness and weight consistency against target |
| In-line spot checks | Throughout the production run | Ongoing consistency versus the retained reference sample |
Tip: Request photos of the first-off inspection units compared directly against the approved counter sample before the factory proceeds to full-line production. This single checkpoint, conducted within the first day or two of a production run, catches the majority of systemic quality drift before it compounds across thousands of units. Buyers who skip this step and only inspect finished goods at the end of the run often discover a consistent, factory-wide deviation — a slightly different firmness or a subtly shifted color — that has already affected the entire order and is far more expensive to remediate at that point.
Phase 7: Final Inspection and Quality Sign-Off
Once mass production is complete, a final inspection confirms that the finished goods meet the approved standard before shipment. This is typically conducted using a recognized statistical sampling method — commonly AQL (Acceptable Quality Limit) inspection — rather than a 100 percent unit-by-unit check, which would be impractical for most order volumes.
A thorough final inspection checks a statistically representative sample against the same criteria used throughout development: dimensions, color, fabric and stuffing quality, stitching integrity, accessory attachment, labeling accuracy, and overall finishing standard, alongside a check of carton packing, quantity, and export documentation. Defects are classified by severity — critical, major, and minor — with pre-agreed AQL thresholds determining whether the shipment passes.
AQL Defect Classification for Plush Toy Final Inspection
| Defect Class | Definition | Example | Typical AQL Level |
|---|---|---|---|
| Critical | Poses a safety risk to the end user | Loose small accessory, sharp internal component | 0 (zero tolerance) |
| Major | Affects function or salability significantly | Visible color mismatch, incorrect size | 2.5 |
| Minor | Cosmetic issue unlikely to affect sale | Slightly uneven stitching, minor loose thread | 4.0 |
Tip: Agree on the specific AQL levels and defect classifications in writing before production begins, not at the point of final inspection. Buyers and factories occasionally hold different assumptions about what counts as a major versus a minor defect, and resolving that disagreement after a shipment has already failed inspection creates unnecessary tension and delay. A written AQL agreement, referenced against the tech pack and the approved counter sample, gives both sides an objective standard to inspect against rather than a subjective judgment call made under time pressure.
Phase 8: Packaging and Shipping
The final phase of the custom plush toy development workflow covers packaging execution and logistics. Packaging requirements — poly bags, header cards, gift boxes, hang tags, and any required compliance labeling — should have been specified in the original design brief, but final artwork, barcode assignment, and carton marking are typically confirmed during the mass production phase so they are ready the moment finished goods clear final inspection.

Shipping mode selection is a high-cost and timeline lever. Sea freight is the standard choice for full-container or large partial-container plush toy orders due to its substantially lower per-unit freight cost, while air freight is reserved for smaller orders, urgent restocks, or situations where the cost premium is justified by a hard deadline.
Shipping Mode Comparison for Custom Plush Toy Orders
| Shipping Mode | Typical Transit Time | Relative Cost | Best Suited For |
|---|---|---|---|
| Sea freight (FCL) | 25–40 days port-to-port | Lowest per unit | Large-volume standard orders |
| Sea freight (LCL) | 30–45 days port-to-port | Low-moderate per unit | Mid-size orders not filling a container |
| Air freight | 5–10 days | Highest per unit | Urgent restocks, small orders, samples |
| Express courier | 3–7 days | Very high per unit | Samples and very small parcels |
Tip: Confirm packaging dielines and carton specifications well before mass production finishes, rather than treating packaging as an afterthought once the toys themselves are complete. Packaging delays — waiting on approved artwork, sourcing a specific gift box, or resolving a compliance labeling question — are one of the most common causes of finished goods sitting idle at the factory after production is technically done. Locking packaging specifications early, in parallel with the counter sample stage, keeps the transition from finished production to shipped order as short as possible.
Choosing a Reliable Manufacturing Partner for the Full Workflow
Every phase described above depends on working with a manufacturer capable of executing it competently and consistently. What makes a plush toy manufacturer reliable is not simply its price list or its factory size, but the maturity of its development infrastructure — in-house pattern making, a documented sampling process, accessible safety testing support, and a quality control system that operates the same way on every order, not just the ones under close buyer scrutiny.
Reliability Indicators to Evaluate Before Committing to a Manufacturer
| Indicator | What to Look For | Red Flag |
|---|---|---|
| Pattern making capability | Dedicated in-house pattern makers | Pattern work outsourced with no visibility |
| Sampling process maturity | Clear stages, documented revision policy | Vague timelines, no structured feedback loop |
| QC system | Documented checkpoints described unprompted | QC only mentioned when directly asked |
| Compliance support | Familiarity with target-market standards | Uncertainty about applicable safety standards |
| Communication responsiveness | Specific, detailed answers to technical questions | Generic or delayed responses to brief questions |
A factory such as Xing Wang Plushie that maintains in-house pattern making, a structured sampling and counter sample process, and documented in-process QC checkpoints is generally better positioned to carry a buyer through the full eight-phase workflow without the communication gaps and inconsistencies that occur when any of these functions are outsourced or informally managed.
Common Workflow Mistakes That Delay Development and Increase Cost
The most expensive mistakes in custom plush toy development are rarely dramatic factory failures — they are small process gaps repeated across the workflow that compound into significant delay and cost by the time the finished goods ship. Recognizing these patterns in advance is one of the most effective ways to keep a development project on schedule and on budget.

Common Custom Plush Toy Development Mistakes and How to Prevent Them
| Mistake | Phase Affected | Consequence | Prevention |
|---|---|---|---|
| Ambiguous or incomplete brief | Concept & Design | Multiple avoidable revision rounds | Use a full brief checklist with Pantone references |
| Choosing on price alone | Factory Evaluation | Hidden quality and communication problems later | Itemized quote comparison and reliability check |
| Changing design mid-sampling | Sampling | Wasted sampling cycles, restarted timeline | Freeze the design before the brief is submitted |
| Skipping the counter sample | Sampling / Pre-production | Sample-to-bulk inconsistency in the full order | Always build and approve a counter sample |
| Testing too late | Safety Compliance | Compliance issues found after bulk production starts | Begin testing during the sampling phase |
| No first-off inspection | Mass Production | Systemic defects discovered only at the end of the run | Inspect first-off units against the counter sample |
| Packaging finalized too late | Packaging & Shipping | Finished goods delayed waiting on artwork or cartons | Lock packaging specs during counter sample stage |
Conclusion
The custom plush toy development workflow is a long process with many interdependent parts, but it is not an unpredictable one. Every phase — from the initial design brief through final shipment — exists to manage a specific, well-understood risk, and buyers who work through each phase deliberately, rather than trying to compress or skip stages to save time, consistently achieve better products, more predictable timelines, and lower total development cost than those who treat the workflow as an obstacle between an idea and a finished order.
Understanding this workflow in advance changes the entire experience of custom plush toy development — from a process that happens somewhat unpredictably to the buyer, to one the buyer actively manages at every checkpoint where their input actually matters.
Frequently Asked Questions
Q1. How long does the complete custom plush toy development workflow typically take from concept to shipped goods?
The full workflow generally spans three to five months for a first-time order of moderate complexity, though this varies significantly based on design complexity, number of revision rounds required, order volume, and shipping mode. Design brief and factory selection typically take two to five weeks combined, sampling through counter sample approval takes five to nine weeks, mass production runs another four to seven weeks depending on order size, and shipping adds anywhere from one to six weeks depending on whether sea or air freight is used. Buyers developing a straightforward design with an experienced factory and no major revision issues can move through the workflow faster than this range; complex designs, licensed IP requiring additional approval steps, or first-time work with a new factory typically extend it.
Q2. Can any of the eight workflow phases run in parallel to shorten the overall timeline?
Yes, several phases can overlap without compromising quality. Safety testing preparation can begin as soon as a development sample is available rather than waiting for counter sample approval. Packaging artwork and carton specifications can be finalized while the counter sample stage is underway. Material sourcing for bulk production can begin in parallel with the final revision rounds once the core design elements are approved, even if minor cosmetic details are still being confirmed. The phases that cannot be safely compressed or run in parallel are the sequential technical dependencies — pattern making must precede first sample construction, and the counter sample must be approved before mass production begins, because each of these steps directly depends on the output of the one before it.
Q3. What is the difference between a development sample and a counter sample, and is the counter sample really necessary?
A development sample is built under carefully managed sampling conditions, often by a single skilled sampling sewer using small quantities of hand-selected material, and its purpose is to confirm and refine the design itself. A counter sample is built using the actual bulk production materials, machinery, and process the full order will use, and its purpose is to confirm that the approved design can be reliably reproduced at scale. The counter sample is not a redundant step — it consistently surfaces deviations, such as dye-lot color shifts or machine-stuffing firmness differences, that a development sample cannot reveal because it was never built under production conditions. Skipping it does not eliminate these risks; it simply defers them to the much more expensive point of a completed bulk production run.
Q4. How many revision rounds should a buyer expect during the sampling phase?
Most well-prepared custom plush toy development projects require two to four revision rounds between the first sample and final approval, though this varies with design complexity and brief quality. A highly detailed brief with Pantone color references, physical swatches, and precise dimensional specifications tends to reduce this to one or two rounds, since fewer ambiguities exist for the factory to interpret. A vague or incomplete brief, inconsistent evaluation lighting, or fragmented feedback from multiple internal stakeholders tend to push the count higher, sometimes significantly. Tracking each revision item in a shared change log, rather than relying on email threads alone, is one of the most effective ways to prevent previously resolved issues from reappearing in later rounds and inflating the total count unnecessarily.
Q5. What safety certifications are required before a custom plush toy can be sold in the United States or European Union?
For the United States market, plush toys intended for children generally must comply with ASTM F963 and the requirements of the Consumer Product Safety Improvement Act (CPSIA), covering mechanical hazards, flammability, and restricted substances such as lead and phthalates. For the European Union, EN71 compliance is required across its relevant parts — EN71-1 for mechanical and physical properties, EN71-2 for flammability, and EN71-3 for the migration of certain chemical elements — along with CE marking requirements. Buyers selling into multiple markets should confirm which specific standards apply to their target countries early in the development workflow, since testing requirements affect material selection decisions that are far easier to address during sampling than after bulk production has already begun.
Q6. What happens if the final inspection identifies defects that exceed the agreed AQL threshold?
When a shipment fails AQL inspection, the standard next step is a negotiated corrective action agreement between the buyer and the factory rather than an automatic shipment block, though the buyer retains the right to reject the shipment entirely for critical defects such as safety hazards. Typical corrective actions include a full or partial re-sort of the affected units to remove defective pieces, a rework pass to correct a specific recurring issue such as loose stitching, or a negotiated price adjustment if the buyer chooses to accept the shipment with acknowledged minor defects. The specific remedy depends on the severity classification of the defects found and the terms established in the manufacturing agreement before production began, which is why agreeing on AQL levels and defect classifications in writing at the start of the project matters as much as the inspection itself.
Q7. Is it possible to develop a custom plush toy without visiting the factory in person?
Yes, the large majority of custom plush toy development projects are completed entirely remotely, using video calls, detailed photography, and shipped physical samples in place of in-person visits. Remote development works well for the design, sampling, and revision phases, provided the buyer insists on receiving physical samples for hands-on evaluation rather than approving based on photographs alone, since tactile properties like stuffing density and fabric hand-feel cannot be reliably assessed through images. For final inspection specifically, buyers unable to travel commonly engage a third-party inspection service to conduct the AQL check on their behalf and provide an independent report, which offers a reasonable substitute for physical presence at the most quality-critical checkpoint in the workflow.
Q8. How should a buyer manage the transition from a successful first order to a repeat or reorder production run?
Reorders should reference the original approved counter sample and complete tech pack rather than relying on the factory’s memory of the original specification, since even a reliable factory can experience gradual drift over time or across different production teams. Best practice is to archive the original approved physical sample in a controlled environment, request that bulk material swatches for the reorder be checked against the archived sample before cutting begins, and confirm that any personnel changes at the factory have not altered established work instructions. Established manufacturing relationships generally make reorders faster and lower-risk than first orders, since the factory has already built institutional knowledge of the buyer’s standards, but this benefit depends on maintaining accurate reference documentation rather than assuming institutional memory alone will preserve consistency indefinitely.